19 iPhone Photography Tips to Level up Your Photos 2024
Summary: This post will offer you 19 iPhone photography tips for you to get better photo shooting skills and learn how to take good photos with iPhone.
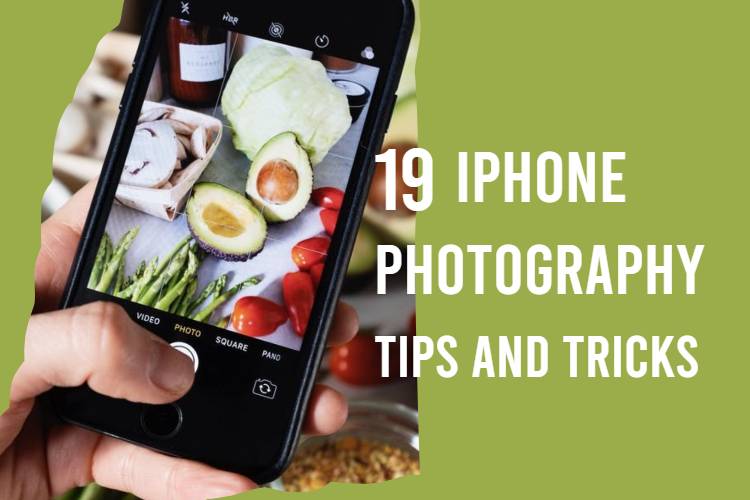
The new iPhone 15 is already on sale. Apple has invested much money to develop the iPhone camera system. With every year of updating, the iPhone camera system is increasingly powerful. But maybe most of you don’t know how to take good photos with iPhone.
With these professional phone cameras, you need to know some photography tips for iPhone. Here are 19 iPhone photography tips for you to quickly go through all the basic features of the iPhone camera. Then, we will find useful photo tricks to take better iPhone photos. There are iPhone cool picture secrets at the end, you need to know them!
Come on, let’s explore.
iPhone Photography Tips for Best Photography
How to take good photos? Here are photography tips for iPhone. You can learn the following skills to better take advantage of your best iPhone camera.
Capture Photos with Depth
The depth of field effect actually imitates our eyes. When we look at something, our eyes will automatically focus on the main object and blur other things around. The depth-of-field effect is trying to detect the objects' distance from the iPhone lenses and blur the background. This effect will obviously stand the subject out and create a professional photography effect.
When you hold on to the iPhone camera to aim at the object, tap the object to focus. Then wait for a second to process. Then you can tap the shoot button to get a well depth-of-field effect photo.
By the way, you can do it in reverse. When we capture photos with depth, we usually put the object in front. We can try to shoot when something is blurred in front and focus on the main object behind.
Get A Grid for Composition
How to take professional photos with iPhone? If you are a beginner in iPhone photography, you probably need to get a grid for the first step. A gird will help you better compose your photos and improve your awareness of composition. And you will find lots of photography lessons will teach you how to compose photos at the beginning.
If you have your pictures taken, it doesn’t matter, you just need to resize the images to the correct composition. But you need to first improve your photo composition awareness.
Make It Simple
There are many iPhone photography tips for professional photographers. Even though so many photographic theories can be used in a photo, simple photos will capture more attention. It is hard to evaluate the quality of a picture through photographic skills. But the feeling won’t cheat.
Remember that word from Apple “less is more”. A simple photo may contain no photographic skills, but a good feeling is deserved.
Use Symmetry
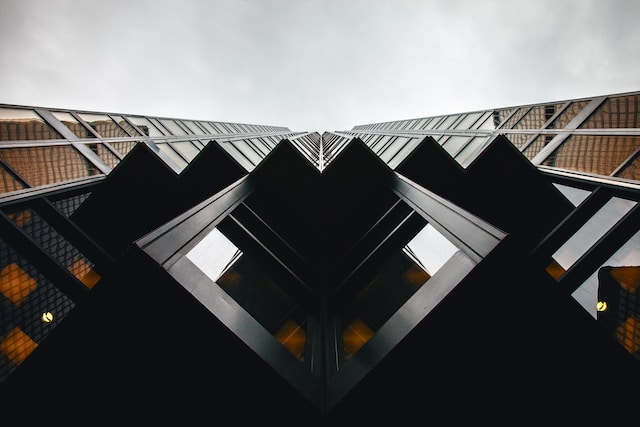
Using symmetry is a common photography skill. And it is very simple for a beginner to learn. You can try to take some building photos with your iPhone camera. Use the grid to find the symmetry in your photos, and make amazing pictures a sense of symmetry and beauty.
Take Silhouette Photos
Silhouette photos usually make the main object into a black shadow. This silhouette effect will make great photos more dramatic, and full of mystique.
You can use your iPhone to shoot against the light source and make the main object back against the light. When the light is strong enough, you can easily take silhouette photos. If not, try to tap to focus on the light source and adjust the exposure.
Shooting from A Different Angle
Don’t just stand there still holding your iPhone to take photos. We know we can zoom in and zoom out to better focus. But the better way is to move and find the best angle for shooting.
Don’t take a picture with an iPhone at head-up. Try a low angle or overhead angle. Different angles will have different effects on photos. The unique angle may have more interesting discoveries. Just try to put your iPhone camera in angles you don’t usually use in usual.
iPhone Camera Tips: Basic Functions You Need to Know
Plain and simple are the main and continuous styles of the iPhone camera, but it doesn’t mean that its features are crude. How to take good photos with iPhone is always a core idea for Apple, and you will get the answer from its iPhone camera through these iPhone photo tips.
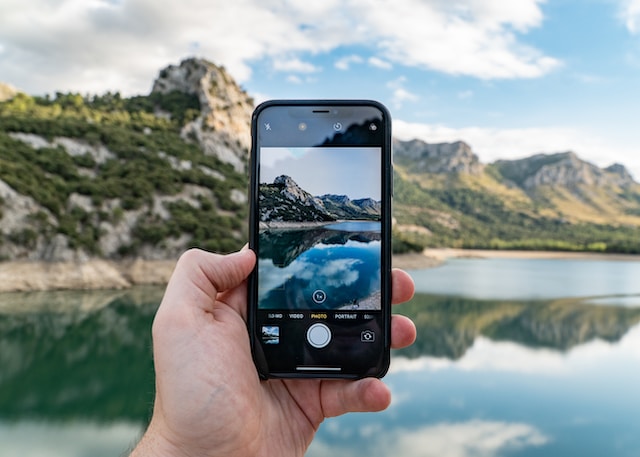
Capture Action Shots with Burst Mode
Maybe sometimes you don’t have the opportunity to capture those wonderful fleeting moments. Try to use burst mode to get your quick take. Easy to learn! You just need to long press the camera button and swipe to the left. Then it starts to quick take.
You can use burst mode to take something or somebody in quick motion. Or use quick take to capture the fleeting fireworks, running dogs and cats, fast leopards, etc. But this function needs a powerful iPhone camera system processing all the time, it may heat the iPhone soon.
By the way, it takes too fast in seconds that I need to pick up photos from dozens of photos. It is so hard for me to pick up the best photography. And when I use burst mode, I need to put my finger on the screen all the time.
Adjust Focus and Exposure Settings
Tap the iPhone camera screen, you can find a yellow box, this is to focus and adjust the exposure. You can move the sun on the right side to adjust the exposure. Plus, you can long press the screen to use AE/AF lock to lock the exposure and focus on the object.
By the way, swipe up the screen and swipe to the left, you can find the exposure icon, you can also adjust exposure in this icon.
Night Mode for A Low-Light Environment
iPhone night mode is an advanced feature that helps you take better night photos with your iPhone. When you want to take beautiful photos at night, night mode will show its power. Just wait for seconds, you will get bright and clear photos on your iPhone. You can easily use this function because it will automatically detect the light of the environment and take a picture in night mode.
You can swap up the control and adjust the time for night mode. Usually, the night mode will present the seconds you need to hold still, but you can adjust the time to be longer for better night photo quality.
Portrait Mode for Stunning Portraits
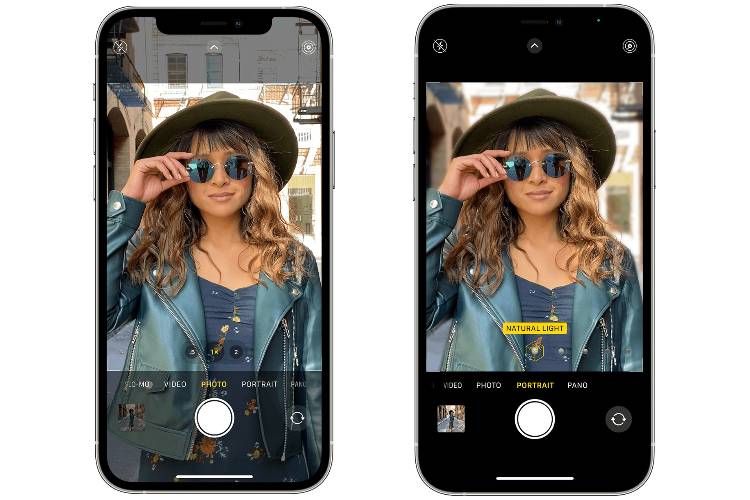
With the iPhone camera updating, you can easily take portraits with iPhone camera. Swipe to the left to use portrait mode. You can adjust 1x or 3x lens and choose different lights.
Macro Shots in Details
Macro shots mean you can easily take photos of small things. You can take macro photos of leaves to find the tiny veins on the surface. You can observe the beautiful colors of butterfly wings by iPhone.
But you need to make your iPhone camera close to the object in 2 centimeters. Then the camera will automatically switch to the macro effect.
Get Shot Prepared with iPhone Camera Timer
iPhone camera timer allows you to take photos after 3 or 10 seconds when you press the shutter button. It will help you get more time to get ready for shooting, use this short time to adjust your position or hold a pose.
How to set a timer on iPhone camera?
Open your iPhone camera and swipe up the control and swipe to the left and find the clock icon, press it to choose the countdown time. And then press the shutter button, and you will hear the clock sound, then get your pose ready.
Turn on Live Photos
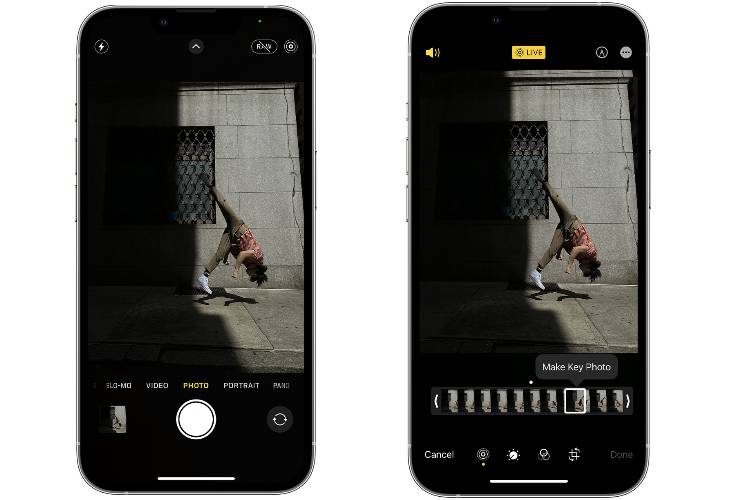
Live photos are a useful feature that when you take a photo, the iPhone camera will simultaneously record a short video. You can long-press the live photos to check the video.
There is a trick on live photos, if you are not satisfied with the photos, just tap “Edit”>live photo icon> move the slider>make key photo. You can easily choose a better photo in your living photos because there is a short video.
ProRAW for post-editing
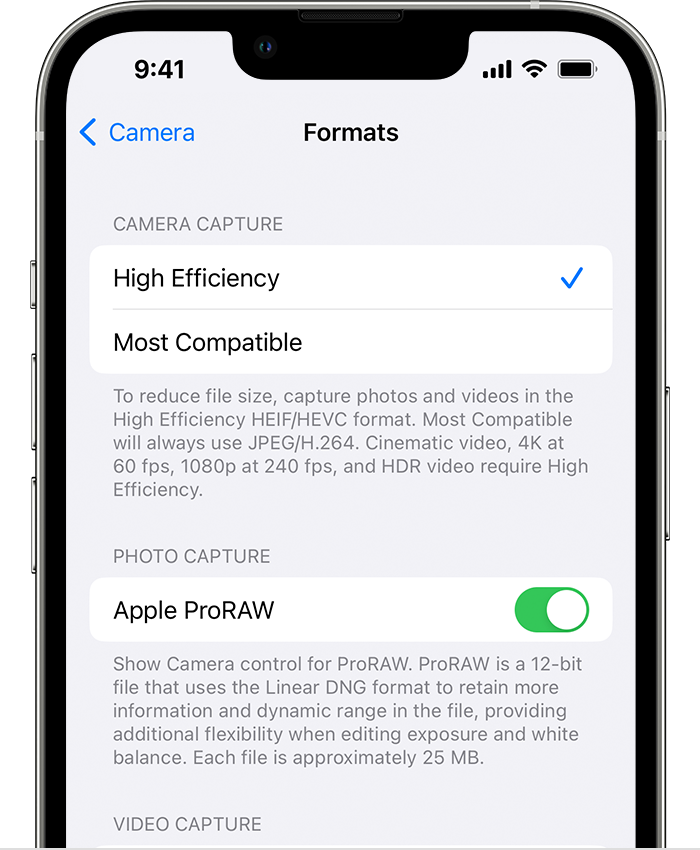
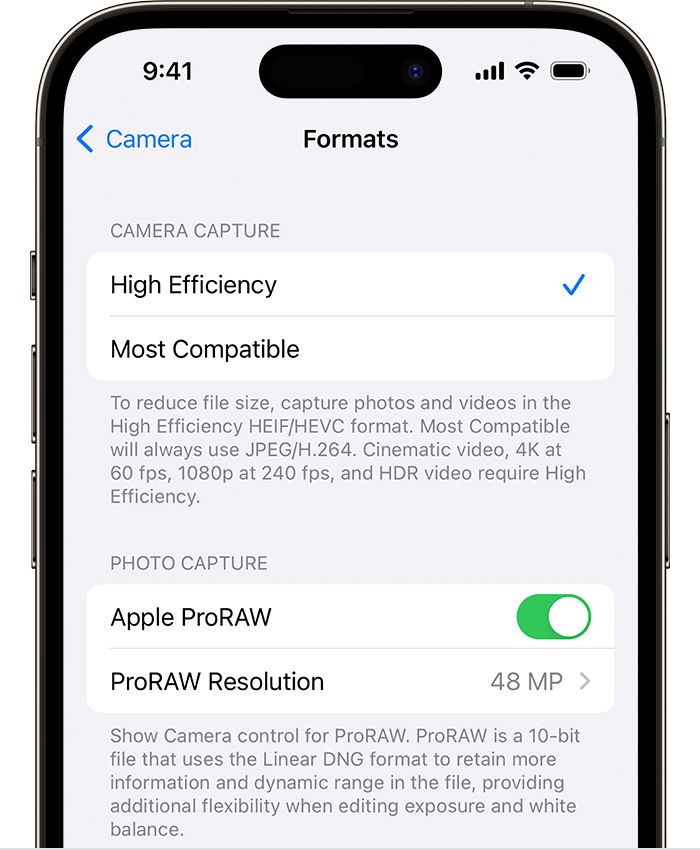
ProRAW format is coming after iPhone 12 pro, you can use this function in iPhone 12 pro and later pro models. ProRAW continues the professional RAW format but with iPhone image processing. You can open ProRAW format to get more professional photograophy editing in Photoshop, Lightroom, etc.
You can follow the picture tutorial to get your ProRAW opened.
Pro tip: resolution choosing is used in iPhone 14 pro and later models.
iPhone Camera Tricks: Few People Know These Secrets
Here are some iPhone photography tips that are used in an interesting way. try to get these tricks to better your amazing pictures instantly.
Take a Screen Capture from Videos
This is one of my favorite iPhone photo tips because we don’t need to hold the phone for taping the shutter button a thousand times. We just need to tap the video record button and hold It up.
Sometimes we may find that group photos are hard to satisfy for all people, somebody’s mouth up, someone’s eyes closed. We need to take photos a thousand times until we are fatigued. Why not choose the iPhone video record?
iPhone video recording is supported for 4K 60fps, so we can record high-quality video for group photos. And the new iPhone cinematic mode is useful. It applies a depth-of-field effect to your videos, which makes videos more professional. And after recording the video, we just look for the best frame in the video and take a screenshot.
Video recording may create a more interesting effect that photos don’t have. We not only get photos from video but also, use the camera to record our happy moments with friends. Make good use of this iPhone photography idea, you will find it easy to get good pictures.
Utilize Photographic Styles
Although photographic styles have come around for a year. But I find that people rarely use this feature. These photographic styles allow you to customize your photo effect and you can use it to create your artistic photography and show your photographic taste.
iPhone cameras always restore the real scene as their requirements, which means what you see is what the photo is. But everyone has his own taste, some may like retro style and some like film style. You can adjust your photographic style to create different photo effects and feelings.
Soft Light for Better Photos
How to take professional photos with iPhone? Are there ways to take great photos like
Photographers do? Maybe you need a reflector.
We all know sometimes although there is enough light source outside, the light is not suitable for shooting. When the photographer is shooting, there is always someone busy around with a whiteboard. Right, that’s a reflector.
A reflector is a good choice for you. The reflector will reflect the light and turn it into natural soft light on your face, it will better your light and make your skin look smoother and cleaner. Some reflectors are foldable and flexible, which are convenient for us to take.
A Tripod for a Steady Shot
A tripod is useful for long-time shooting. If you need to take time-lapse photography with iPhone, holding it for such a long time is super tiring. Using the tripod will help a lot. plus, the tripod is helpful when you need to take group photos, just put your iPhone on a tripod and open the camera timer, enjoy photo shooting now!
Use a Photo Editor to Retouch Professional-Quality Photos
How to make iPhone photos look professional? Taking a picture is the first step for photography, and then is the post-editing. Try on Fotor photo editor to retouch your photos into pro-quality easily.

Try the simplest photo editing tools to transform your ordinary images into incredible things in a few seconds for free.
Convert low-resolution images to high-resolution with only one click.
Fotor photo editor has all-around editing features. You can use a one-tap enhancer to improve your great photos in detail. Or try to crop your image into the correct size or better photo composition. Massive photo effects and filters are available for you to choose from. Face editor is good for you to fix your facial blemishes in a snap. And combined with AI technology, you can easily use AI to enlarge your photos, remove backgrounds, remove objects from photos, etc.
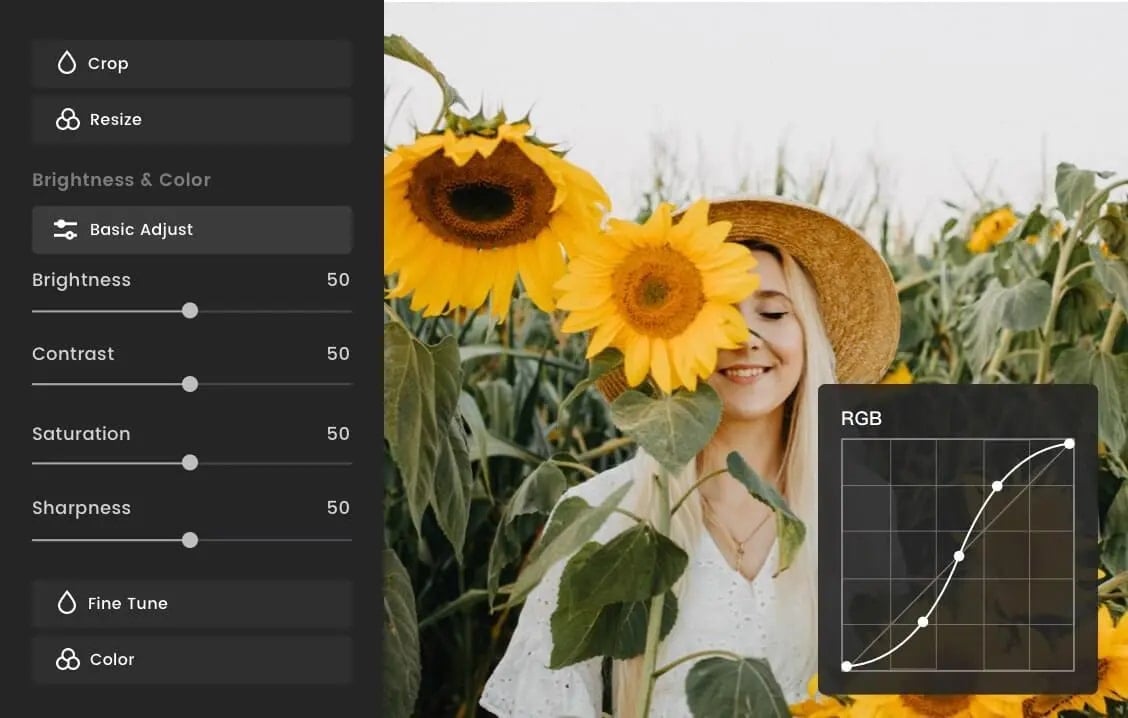
With the best iPhone camera, you need a professional photo editor to handle your photos. Use Fotor photo editor to level up your photos easily. Come and try!
Conclusion
Photographic theories cannot fully teach you how to take good photos with iPhone. Because The combination of theoretical knowledge and practice will make your pictures get better and better. Keep in mind the 19 iPhone photography tips, try to take more photos using these skills. By the way, looking through the works of famous photographers is also a way to improve yourself. At last, use Fotor professional photo editor to level up your photography.
