How to Take Food Photos and Edit Them (With Ultimate Guides)

If you like to share your life on social media, then what you share is sure to include delicate food photos. To some extent, it is becoming a symbol of refined living and more and more of an art.
But how to take good food pictures? Photographing food is harder than it seems. If you are not good at this, you need read this post and follow these steps!
How to Take Food Photos?
1. Define Your Style
The first thing that you need to decide after figuring out what product you’re shooting is what mood you want to go for it. Do you want it bright and happy or do you want it more dark and moody? Once you have that you can start building this world or scene around your main dish.
Knowing the style that you want to go for can really help when you’re deciding on what elements and backgrounds to get. Think about what ingredients go into it, what the culture behinds it, or how you want to present that to your viewer. Then think about where you want this to take place. Do you want it in the kitchen when it’s being created? Or do you want this to be at the dining table when it’s being served and enjoyed by people?
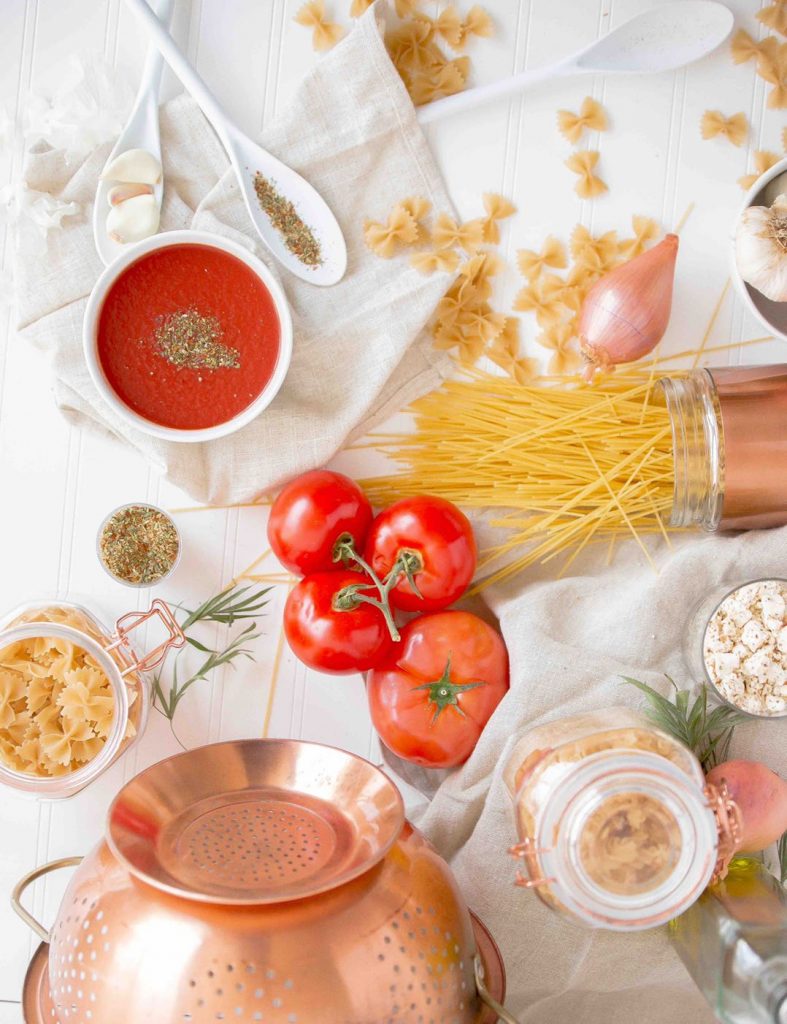
A good way is shooting with the cooking process and the raw ingredients. Covering a few things you can get at the store for the garnish, such as parsley, pumpkin seeds, small gourds, a bread bowl, and some hemp or a burlap fabric to add some textures.
2. Use Right Light
The next thing that you need to look for is where the light is coming from. When shooting in natural light, the white balance is the best, which basically just means that the color white is a true white. It’s better to shoot near a window. But if you don’t have a window to shoot near or you’re shooting at night, you can always add in your own lights. The big thing is the soft shadows. You can use diffusion to soften up hard light or shoot out of direct sunlight.
Do not shoot in direct sunlight. When shooting through a window, the light just comes through naturally. You would never want to stand like outside with the Sun directly shining on your food because that produces shadows that are way too harsh. Another way to remediate the light problem is to use a reflector. What it does is bouncing the light from the back to the front, then back to the plate. So the food that is normally on the front that wouldn’t have light hitting on.
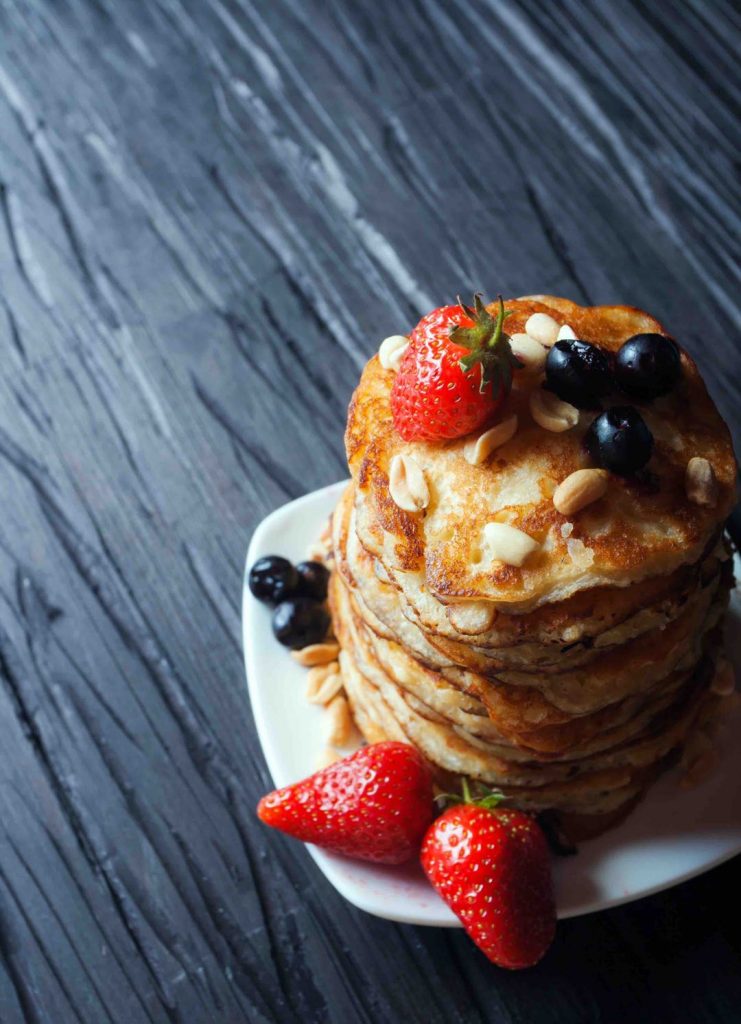
Shooting with side lighting is another lighting way. Side lighting is kind of like backlighting because it still creates some shadow. It just depends on the current situation but it is nice because you still get that contrast. And in general, the food is a little bit more illuminated. If you imagine a clock you could have the light coming in at like 9 o’clock, which would be directly the side light. You can also make it like 10 o’clock. It’s a little bit kind of backlit and kind of like side light. So you can experiment and see what’s working for you.
3. Choose Your Angle
Before you start placing all the items you want to think about what direction and what angle you’re going to be shooting at. The two most popular angles are 45 degrees coming in from the side and then 90 degrees or straight down. Taking shots from a higher angle allows you to include more, such as the atmosphere of the café or restaurant and accompanying drinks and decorations.
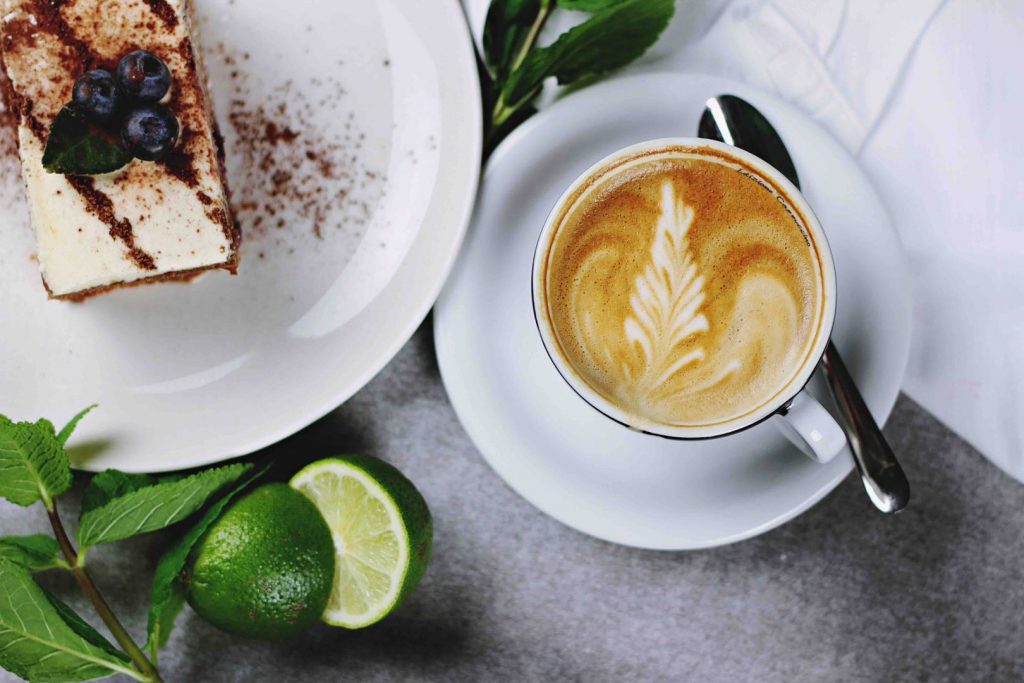
The direction you shoot should be against the light, which means that you’re not on the same side that the light is coming in from. So if the light is coming in from a window, you’d better try and stay on the opposite side of the table. If you’re shooting from overhead, it’s not as big of a deal, but it’s good to plan in case that you want to jump down to 45 degrees.
4. Place the Props
One of the things that can most elevate your food photos is to tell a story with your food photos. When you first started taking photos of food maybe you would just be like “Hey, I made some vegan mac and cheese. Take a photo of the mac and cheese in the bowl with a fork.” But that doesn’t really give your audience the feel for the photo or the photo doesn’t really have any mood to it.
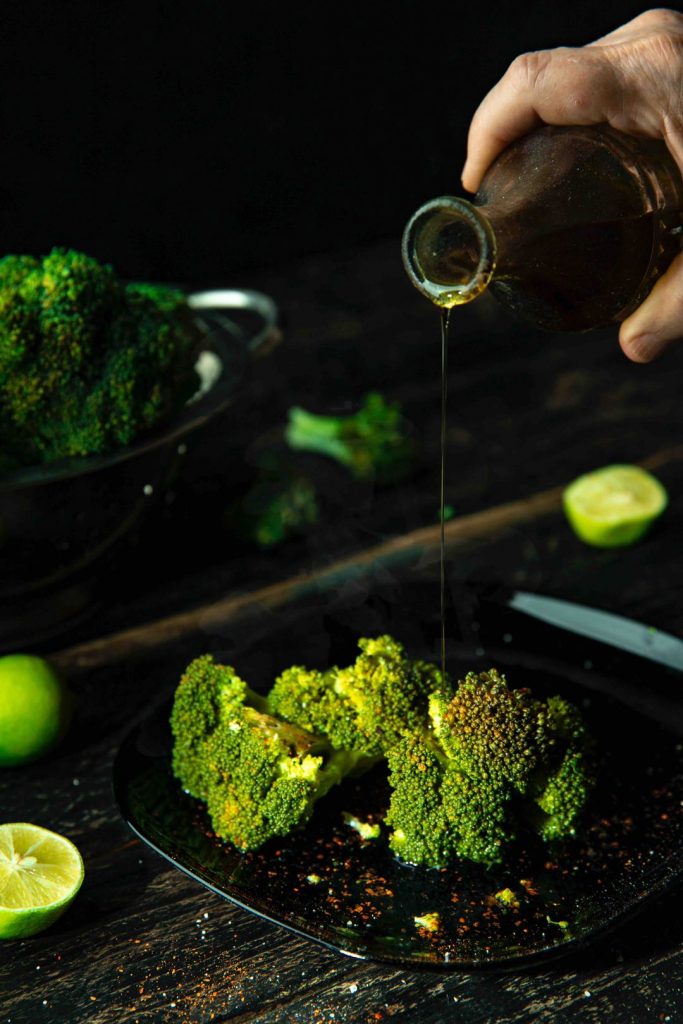
As you can see from this photo, all the colors and shapes of the subjects and props are really complementary. The lemon on the table is pretty much a very similar color to the broccoli in the plate. The color of the plate also matches the table. The shape of the plate is a little bit like a square. So the lemon has been cut and placed as a round circle. There are so many things that are repeated because repetition is always good.
Add in extra props or ingredients so you can visualize as if you were actually making the recipe at home. Or if you’re sitting down to dinner to enjoy the meal. You can have some of the ingredients on the side to put into the shoot to make it seem like you just make this recipe yourself and some of the ingredients are still lying around.
5. Practice the Composition
Another thing that you don’t want to do is block your main dish. So if you’re shooting from the side, make sure to put the shorter items in front of it and the taller items behind your main dish. It can also be helpful to lock your camera down on a tripod and then style everything towards the camera. This way your compositions will not be going to be changing every time you go to take a photo.
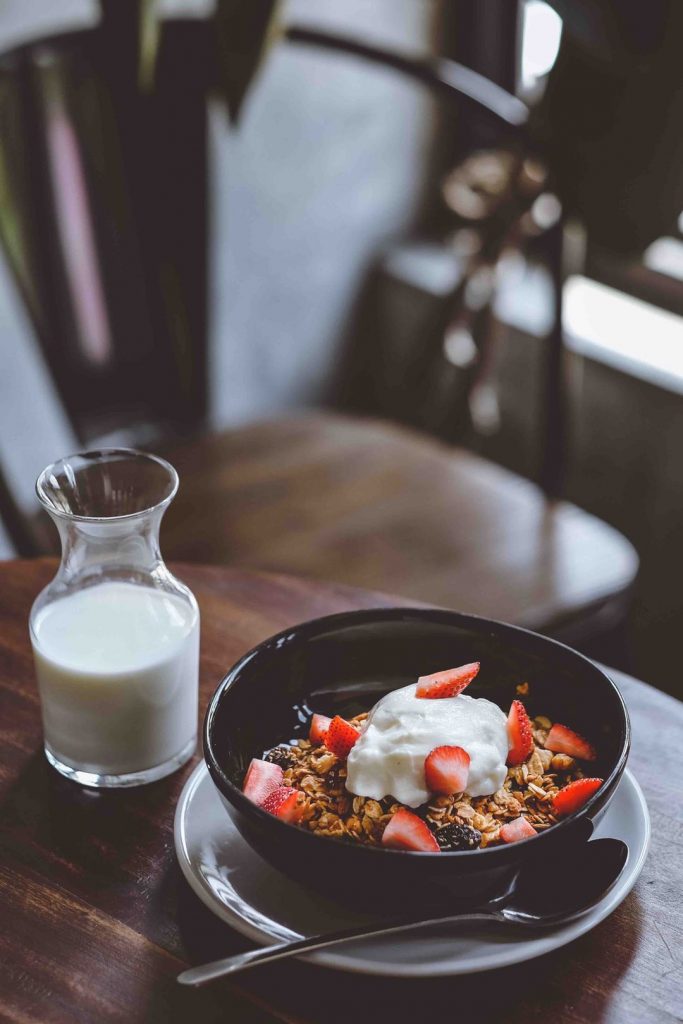
Also, it’s always a good idea to keep your main dish on one of the thirds or directly in the center of the photo. When you’re shooting with the rule of thirds you should place the objects to be either on these lines or at the intersection points of the grid, which helps the photo to be a little bit more balanced.
Keep in mind where this photo is going to end up as well. If you’re going on Instagram, then you will have a four by five crop on it. Or if you’re going for a magazine or a video, it might be something different.
How to Edit Food Photos?
Bringing out the best of your food photos using Fotor. It’s an online photo editor with powerful yet easy-to-use tools that anyone can use with ease. Let’s get started!
Fotor - Online Photo Editor
All-in-one photo editor with easy-to-use editing features and massive design elements.
Step 1: Import Your Photo
After choosing the photos you wish to use, bring them into your design with the IMPORT PHOTOS function on the right side of the screen. In the design panel, you can decide the size of the canvas by yourself based on the size of the background.
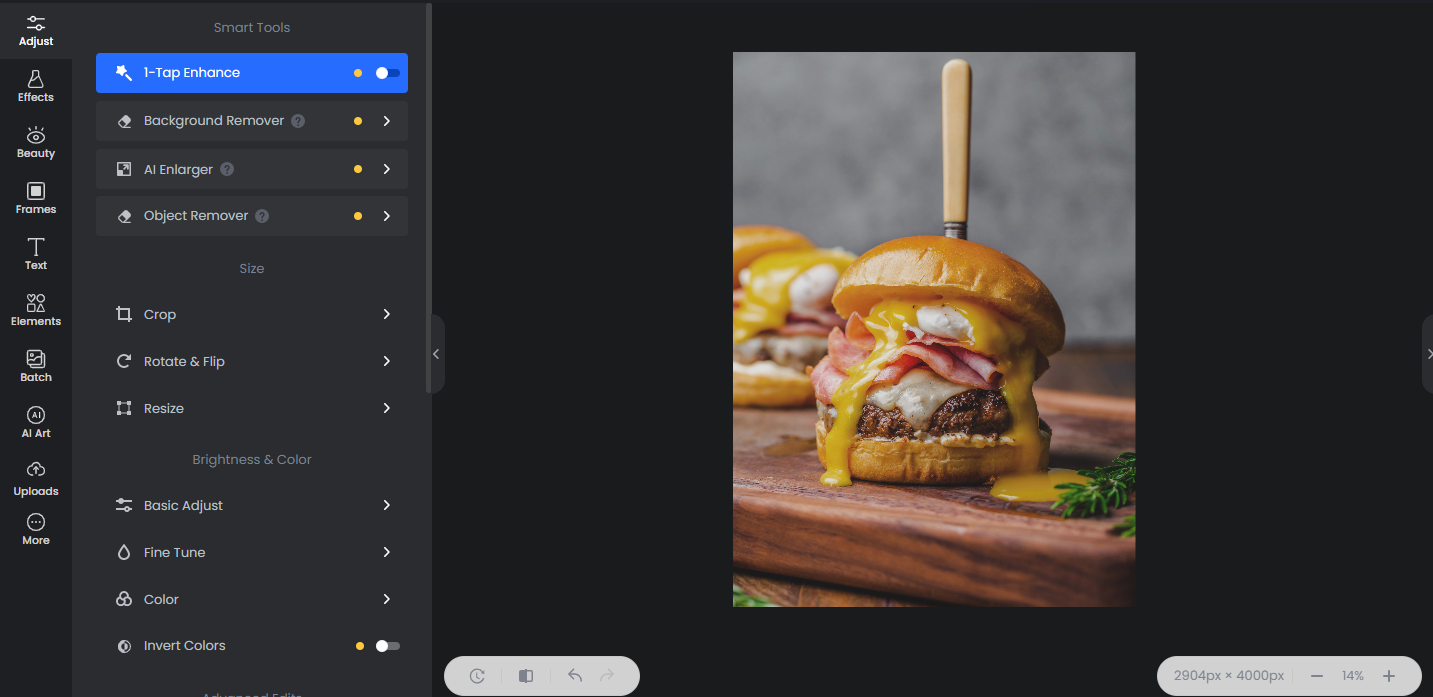
Step 2: Make Some Basic Changes
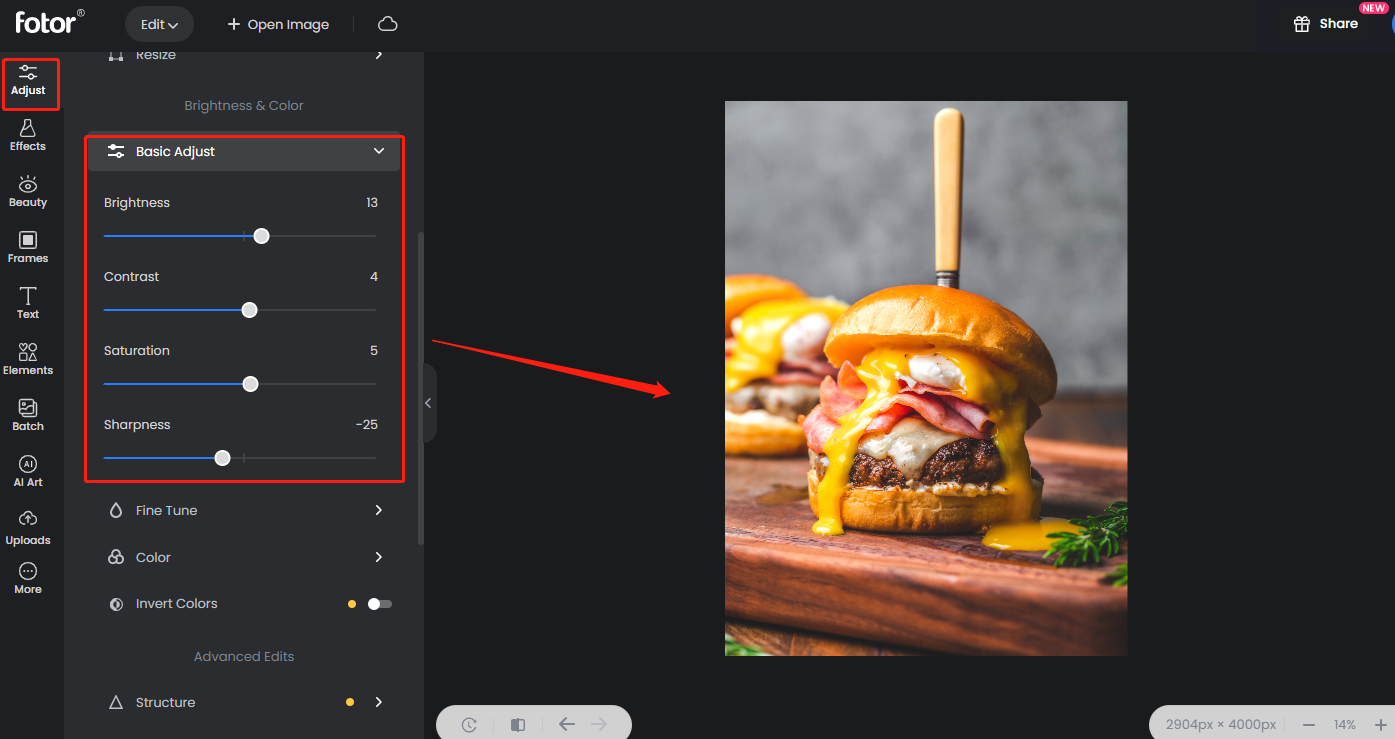
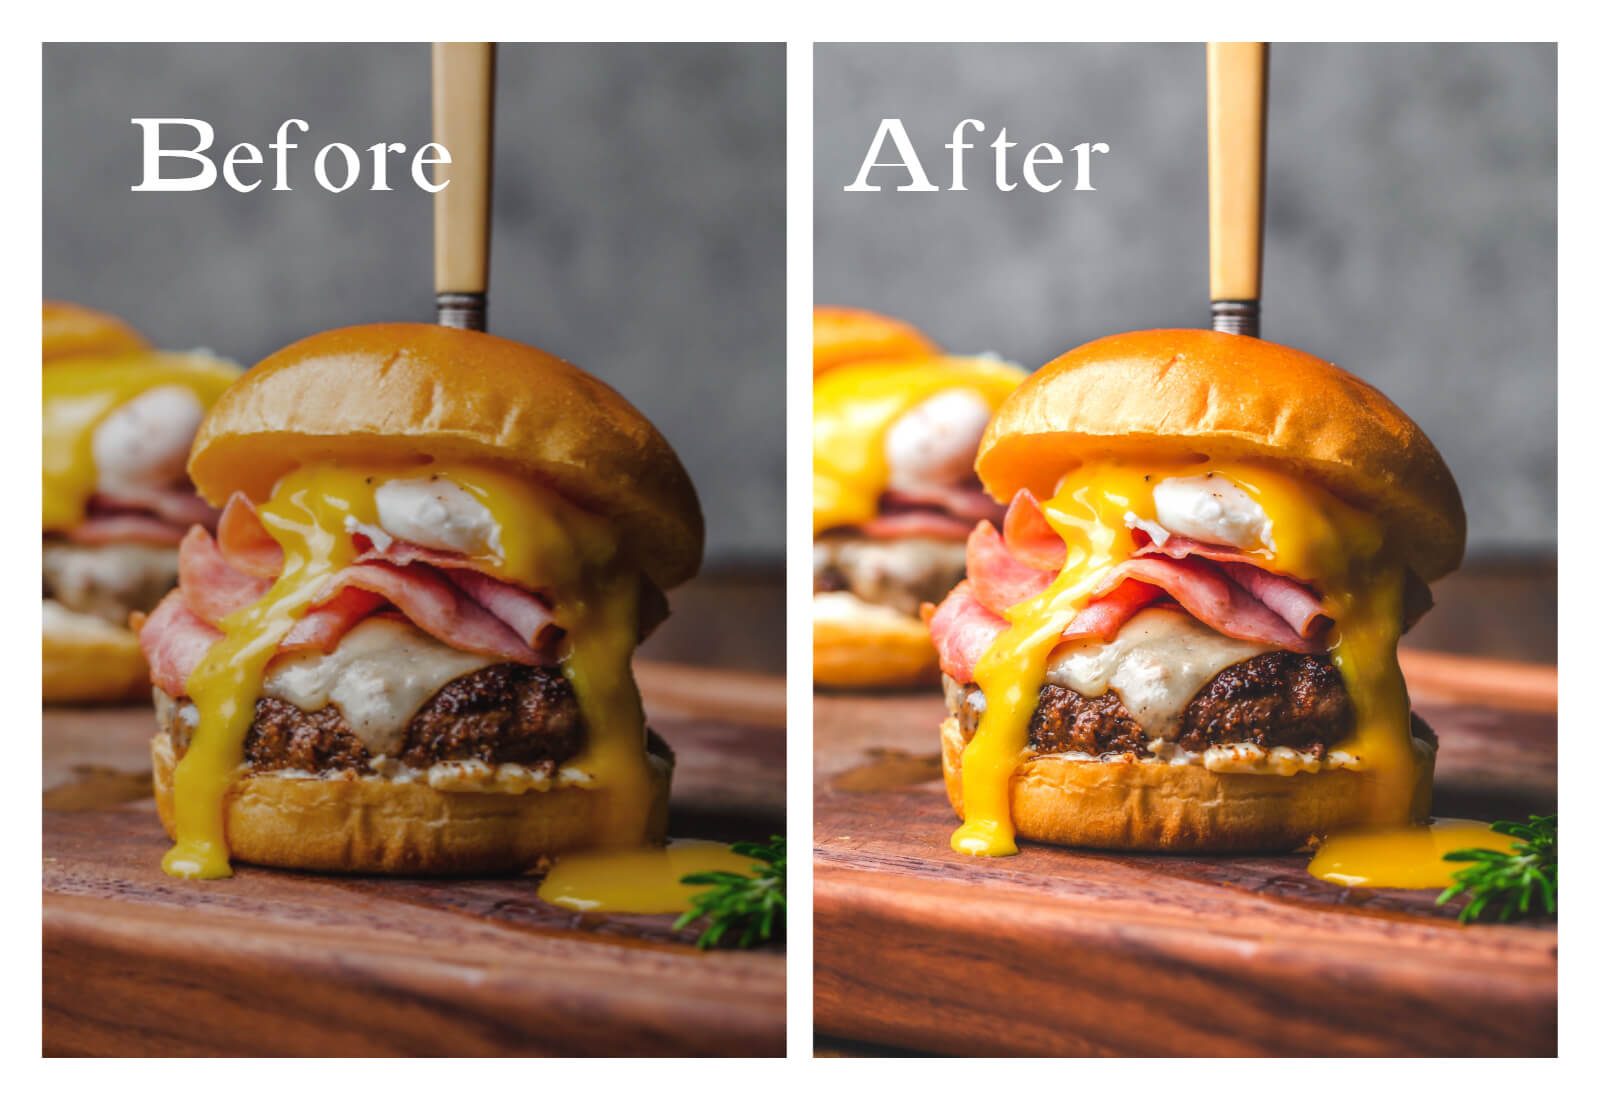
The photo above is rich in color but it seems a little bit dark. So you should make some basic changes to the color, lighting and contrast via Fotor’s Basic Edits. For food, you could make some subtle adjustments, which make it look purer and more appetizing. For this picture, the brightness, contrast, saturation, and color temperature have been adjusted.You can also crop your photo to adjust its composition.
After that, you can add a photo effect to bring out the desired image results. Yellow and orange are the main warm colors in this photo. So you can make them deeper to emphasize them, which could make the food look better. The filter Deeper was applied 77%.
Step3: Use Stickers to Make Your Photo More Creative
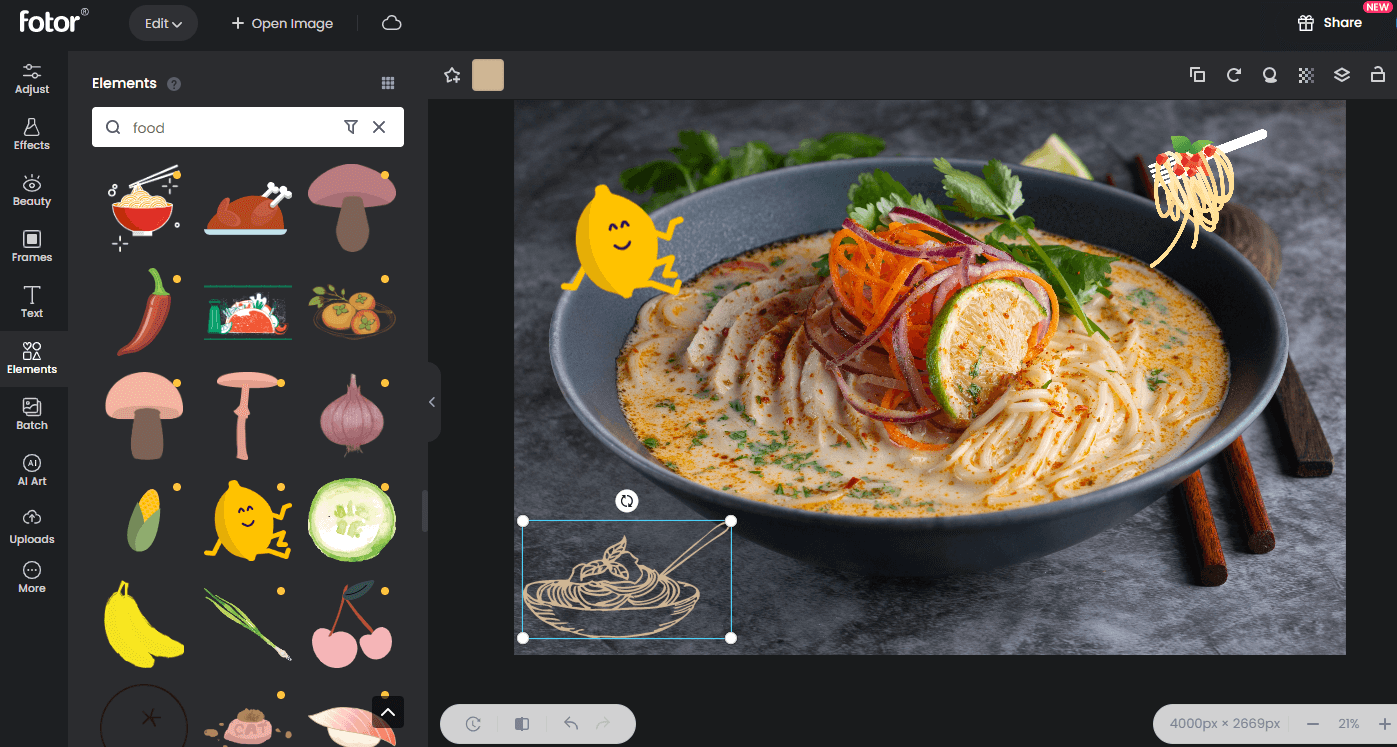
If you have a smaller subject and large white space in the frame, you can use stickers to perfect your photo and make it more stylish. Fotor offers a library of ready to use stickers, illustrations, vectors, and emojis for you to choose from. Plus, the intuitive drag-and-drop editor helps you add stickers to photos easily and quickly. Simple browse and pick a sticker you like, drag it to your photo and voila!
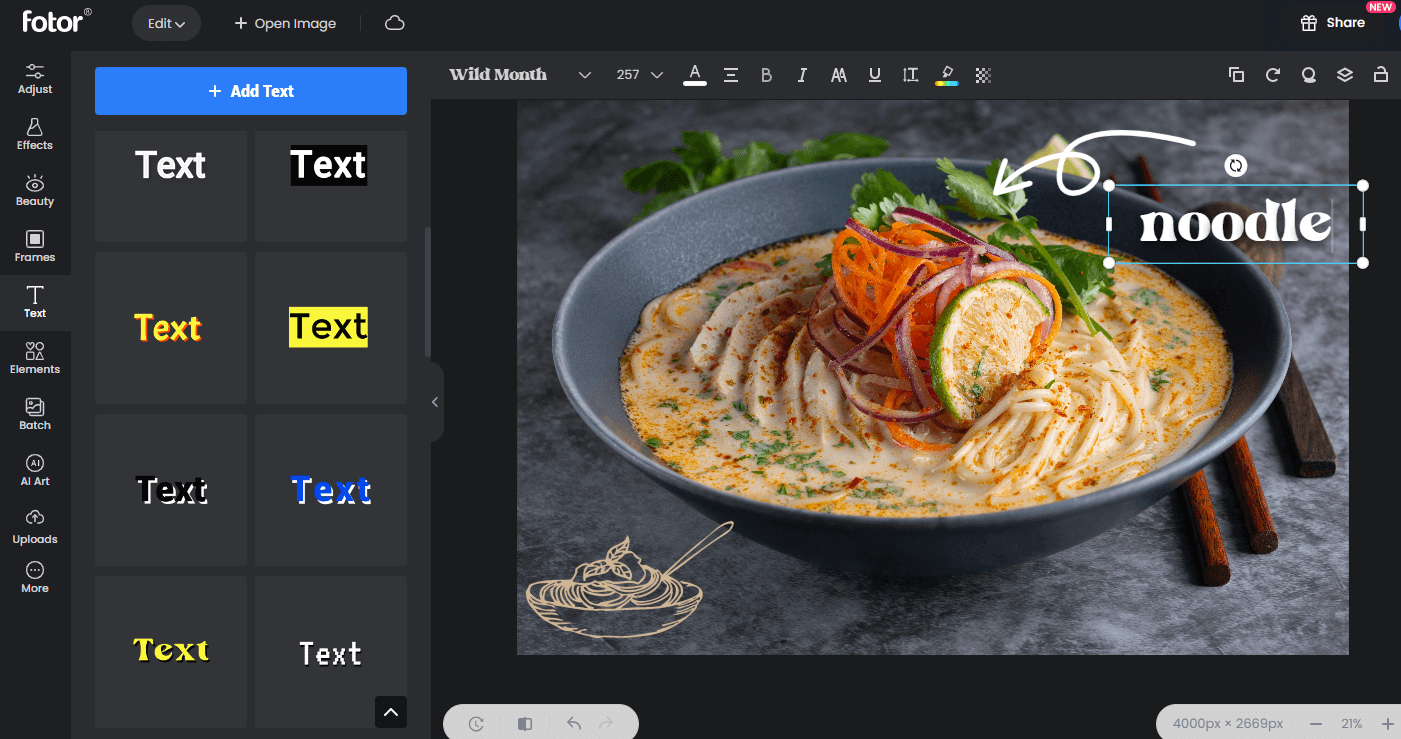
If you want to give more information about this photo you can also add some text on. When creating your work freely, you just need to be aware of the uniformity of style and colors.
Conclusion
If you want more inspiration for photo composition and color schemes, look no further than Fotor! We have more than 30,000 professional design templates and stickers. You can enhance your photos aesthetics with them!
Taking food photography is a learned skill. Hoping these tips will help you as you practice taking better food photos. Experiment and try one or several of these tips next time you are shooting food.
