User Guide
The best FREE photo editing suite! Fotor meets all your photo editing needs!
Follow these simple instructions and kick start your Fotor journey!
Entering Fotor and Switching Between Edit, Collage, Touch Up and Batch
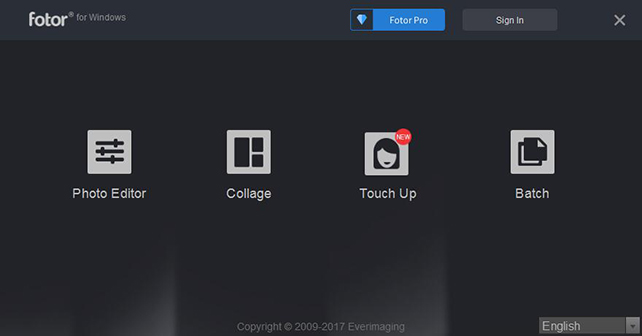
From the home menu, you can enter Fotor in the Edit, Collage, Touch Up or Batch mode. Click on "Edit" to use powerful tools for every essential editing need, plus scenes, effects, borders, Focus and more. Click on "Collage" to mix, match and customize a photo collage. Click on "Touch Up" to give your photos makeup and a makeover – regardless of picture quality. And "Batch" lets you quickly process dozens of photos to save you time and effort.
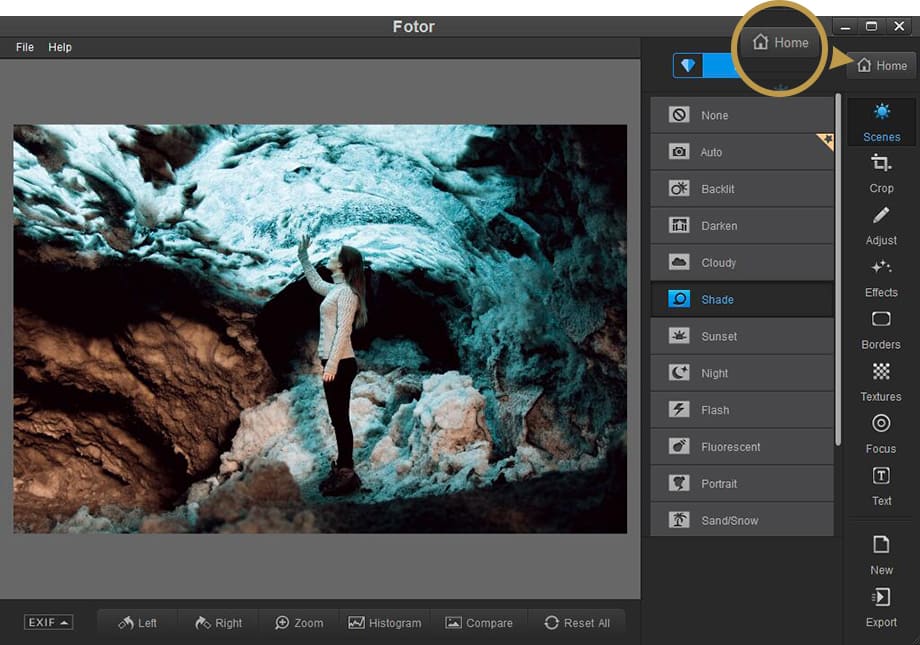
Whenever you are in the Edit, Collage, Touch Up, or Batch mode, simply click on the "Home" button on the upper right-hand side of your screen to return to the home menu and switch modes.
Add photos to edit in one of three ways
Drag your photo in or click on the big icon in the center of your screen to select the photo you would like to edit.
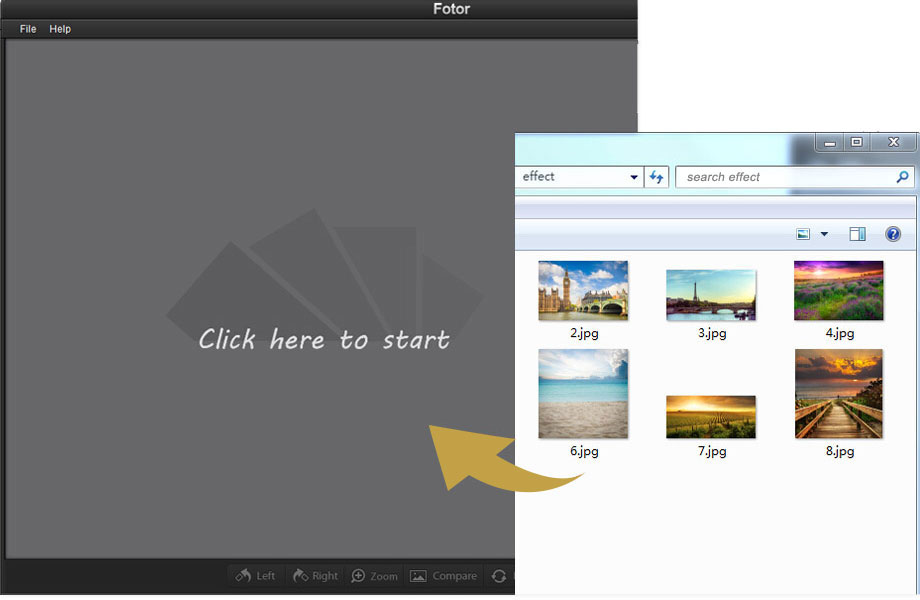
From the “File" menu in the upper left-hand side of the screen, choose “Open" and select an image file to load into the viewer.

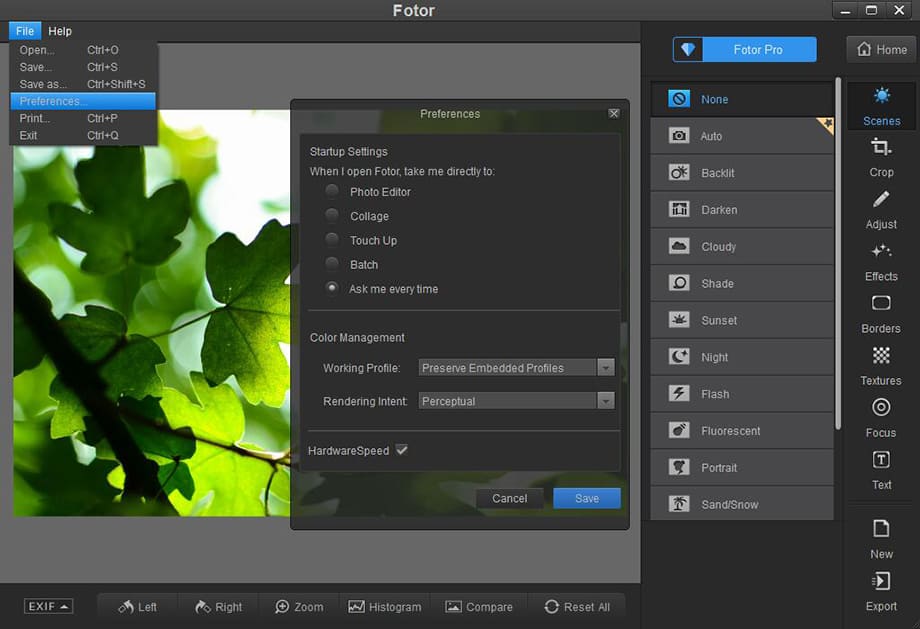
Apply enhancements based on photo-capture conditions
Click on the "Scenes" icon on the top right-hand side of your workstation. From the submenu you may select from a list of 14 different 1-Tap Enhance configurations, or scenes. Each scene has been labeled according to common photo-capturing conditions, including: Auto, Backlit, Darken, Cloudy, Shade, Sunset, Night, Flash, Fluorescent, Portrait, Sand/Snow, Landscape, Theatre, and Food. Feel free to experiment if you are uncertain which option is best, or select "Auto" from the top of the list and Fotor's advanced technology will conduct a pixel-by-pixel analysis of your photo for you.
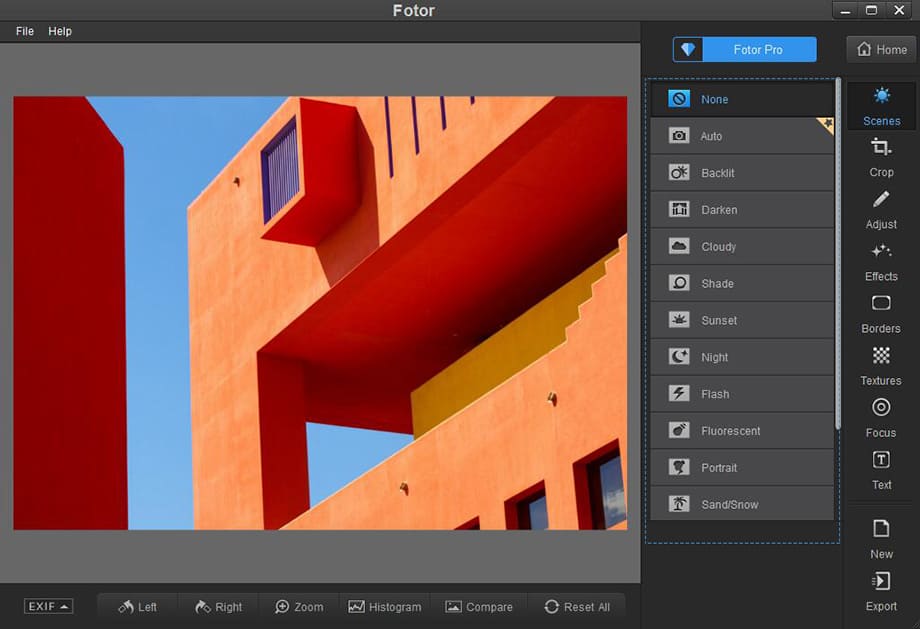
Crop photos
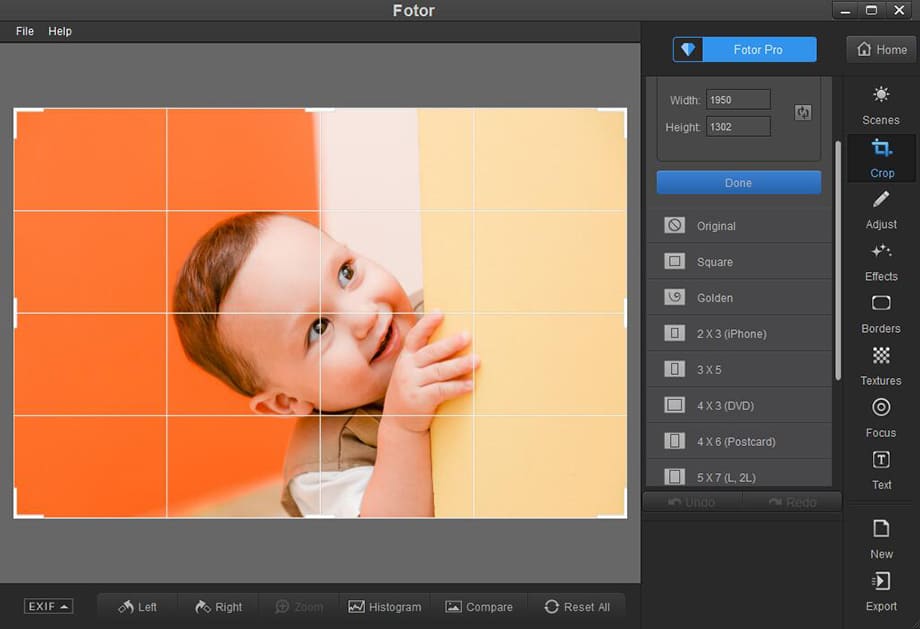
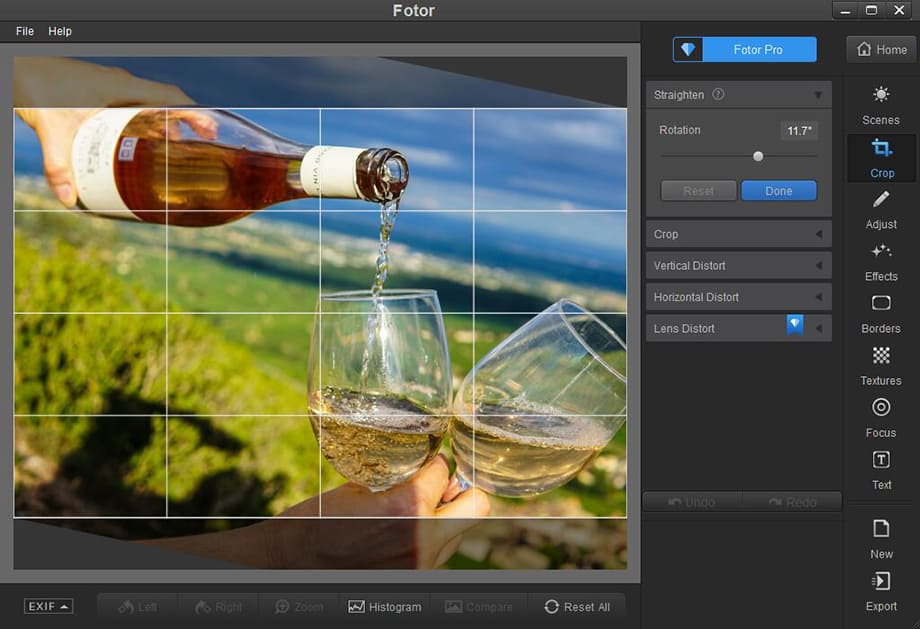
Click on the "Crop" icon on the top right-hand side of your workstation. Before you begin cropping, you can view the original width and height of your photo at the top of the submenu. To crop your image by hand, simply move your mouse over the outer boundaries and drag the lines up and down or from side-to-side. After you have changed the parameters, click anywhere inside of the highlighted portion of the image and drag the selected area to see how it looks.
Another way to crop your photo is to select from the list of aspect ratio presets. Notice that the "Freeform" option at the top of the list is selected by default. Cropping in Freeform mode allows you to customize the size of your photo for a specific purpose. For example, you can match the aspect ratio of a display for use as wallpapers or crop an image to fit your Facebook timeline.
To change the size of your image using numerical aspect ratios, simply click on the box to the right of the width and height fields and type any value. You can also change the direction of the crop by clicking on the small icon with two circular arrows to the right of the width and height fields. Clicking this icon will change the orientation of your photo to have either a vertical or horizontal layout.
Besides "Freeform," you can also select "Original" "Golden" or "Square" from the list, each with default aspect ratio configurations. Remember that these values can be changed by entering different numbers in the width and height fields that appear under the option once it has been selected.
Below Freeform, Original, Square and Golden you will find the following commonly used aspect ratio presets: 2X3 (iPhone), 3X5, 4X3 (DVD), 4X6 (Postcard), 5X7 (L, 2L) 8X10 and 16X19. These presets make it easy to crop your photo when you don't want to hassle with manual adjustments.
Repeat these steps and move the cropped portion over different areas of your image until the highlighted area covers the part of your photo you would like to keep and the darkened area covers the part you would like to discard. When you have the perfect cut, select "Done" at the bottom right-hand side of the submenu and any changes will be locked-in. Remember that if you change your mind you can click on "Undo" or "Redo" at the bottom right-hand side of your workstation and continue cropping.
![]() Straighten
Straighten
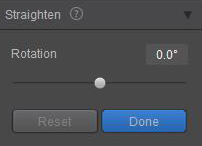
With the straighten tool, you can adjust the angle of your image. Moving the slider to the right tilts the image to the right and moving the slider to the left tilts the image to the left.
Make adjustments
Click on the "Adjust" icon on the right-hand side of your workstation and select from a generous collection of editing tools in order to adjust the following:
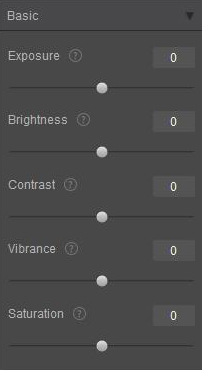
![]() Basic
Basic
Under "Basic" you will find adjustable sliders for manipulating the Exposure, Brightness, Contrast, Vibrance and Saturation of your photo. Move the sliders to the right or left, or input parameter directly for each option in order to see how it changes your image.
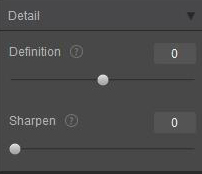
![]() Detail
Detail
Use "Definition" to adjust the overall blur / clarity of your photo and “Sharpen” to adjust picture edge details.
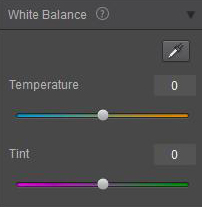
![]() White Balance
White Balance
To adjust the white balance, click on the eyedropper in the upper right-hand corner of the "White Balance" box in the menu. Once you have selected the eyedropper tool, click on any color in any part of your image in order to apply the color scheme to the entire photo. Then fine-tune the white balance "Temperature" using the Kelvin Color temperature scale. Move the slider to the left (negative value) to make the photo appear cooler, or move the slider to the right (positive value) to warm the photo. Finally, adjust the white balance "Tint" to compensate for a green or magenta tint. Move the slider to the left (negative value) to add magenta to the photo or move it to the right (positive value) to add green.
![]() Vignette
Vignette
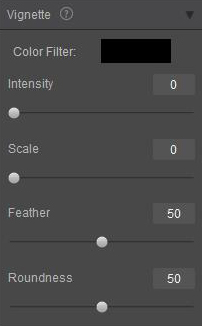
Move the vignette slider to give your photo the exact fade-away effect you want. Move the slider to the right or to the left, or input specific parameter directly for a proper level of intensity, scale, feather and roundness.
![]() Curve
Curve
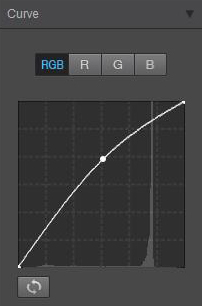
A slightly more advanced feature, this lets you selectively brighten and darken parts of your photos, to increase contrast for example. The left side of the curve represents the darker pixels in the image, and the right the brighter ones. Drag the curve up to make that part of the image brighter, and down to make it darker.
Play with effects
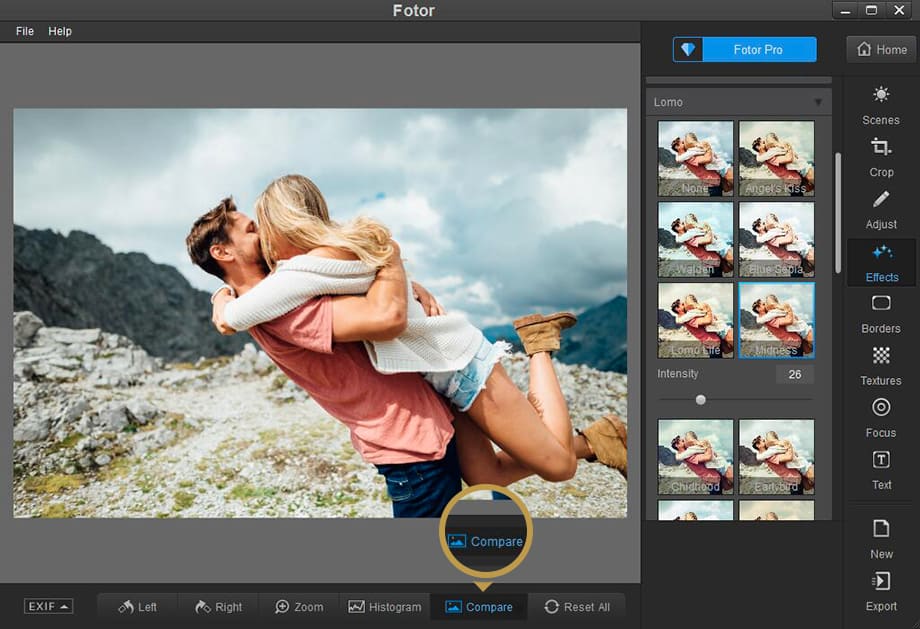
Click on the "Effects" icon on the right-hand side of your workstation. Select from the tabs at the top of the submenu to preview thumbnails of various effects in the following 19 categories: B/M, Cinematic, Artistic, Classic, Purity, Disposable, Filmatic, Light Leaking, Groovy, Lomo, Mellow, Mono, Retro, Returned, Serenity, Spring, Vintage, Warm Winter, Solar.
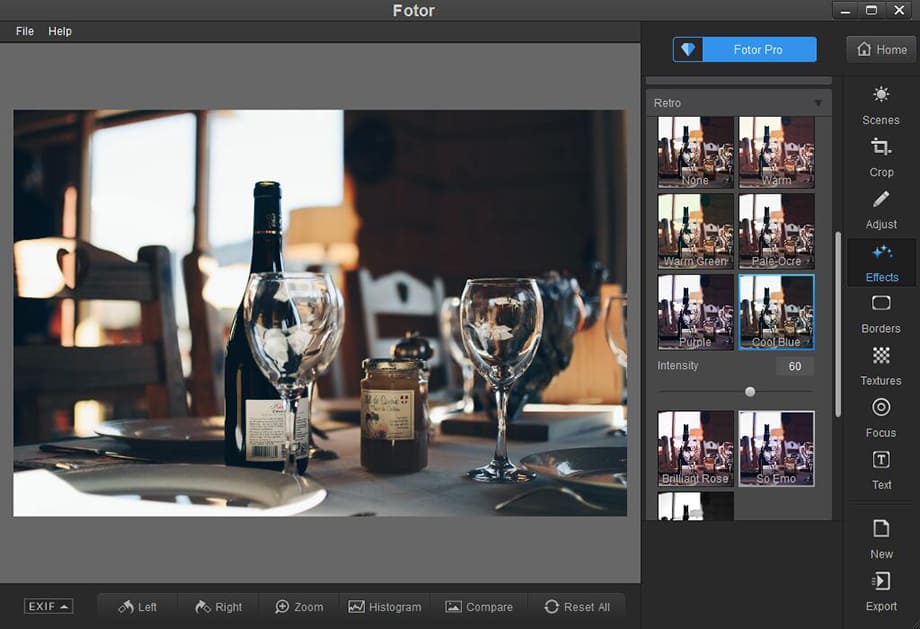
From within each tab you can move the slider on the right-hand side and browse all of the ten to twenty effects in each category. Click on any thumbnail preview to see how it looks on your photo. Once you have clicked on a specific effect, an intensity slider will appears under the thumbnail preview. Move the slider to the right to crank the effect up or move it to the left to turn down the intensity of the effect.
Add a border
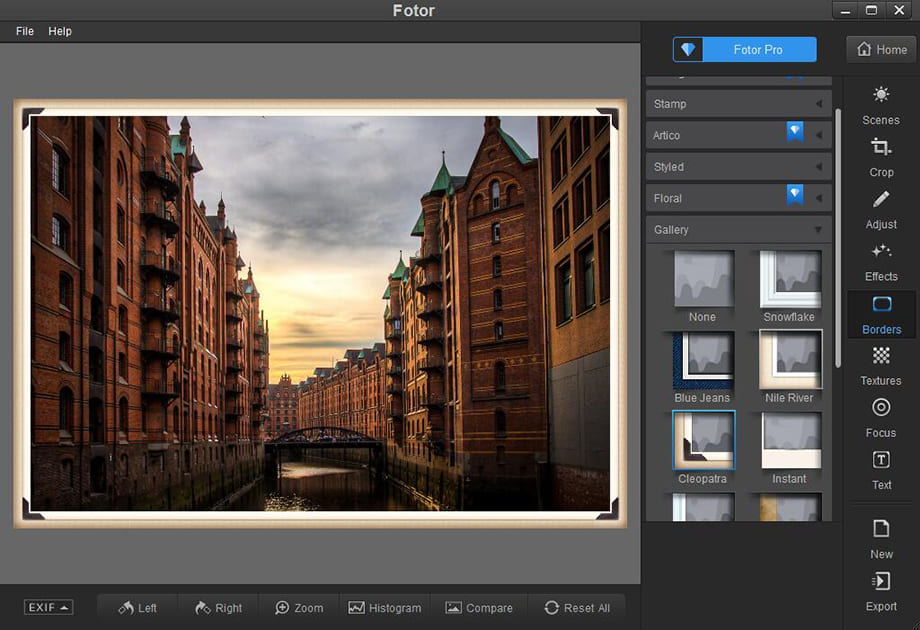
Select the "Borders" icon on the right-hand side of your workstation. Move the slider on the right-hand side of the submenu in order to view all thirty options. You can click on the various thumbnails to preview how each border looks around your photo until you find the perfect fit.
Focus
There are Circle and Tilt-Shift two modes to choose from, giving your images the depth-of-field normally seen only on professional-grade DSLR cameras.
To get started, click “Focus” icon on the right-hand side of your workstation. At the top of the submenu you can select the Circle Mode or Tilt-Shift Mode that you would like to use. Slide the "Mode" knob to the left if you would like to selectively focus circular areas, or drag the knob to the right in order to selectively focus across linear sections of your photo. Under either the circular or linear mode, choose from seven distinct apertures that correspond to different levels of intensity. F/16 at the top of the list results in the lowest level of blur effect, with each option after that increasing the strength of the blur.
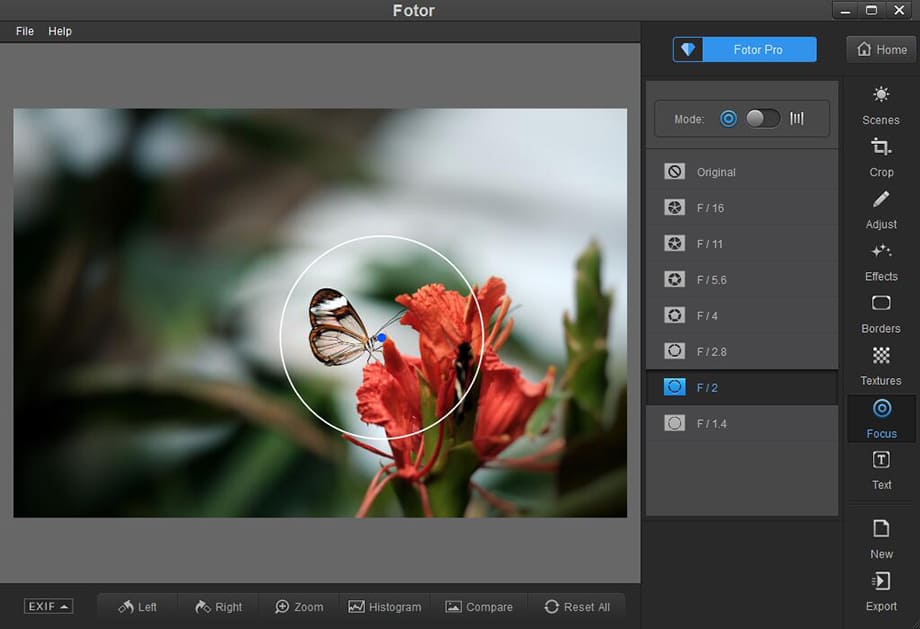
In the circle mode, click anywhere inside the circle and drag it
over the portion of the photo that you would like to remain
in-focus. You can also grab the parameter of the circle and move
your mouse inwards to make the circular area smaller or expand the
focused area by moving your mouse outwards. The inner circle will
be clear, the space outside the outer circle will be blurred, and
in between a transition will be applied from focused to
blurred.
In the linear tilt-shift mode, the default orientation of the
selected area is vertical. To change the width of the area you
would like to remain in focus, grab either the left or right side
of the boundary, then move the line outward for a wider focused
area or inward for more narrow coverage. To change the direction
the linear path extends across your image; move your mouse
anywhere over your image and then grab and hold the small
circular-arrow that appears in the center. Drag your mouse in a
slow, circular motion (clockwise or counterclockwise) to change
the angle of the linear path, then stop and release your mouse
when it is just right. To move the entire linear path of the
selected area, click anywhere within the boundaries (except for
the small circular icon directly in the center) and drag the
selected area until it covers the part of your photo that you
would like to keep in focus. The space in between the two inner
lines will remain focused, the space outside the two outer lines
will be blurred, and in between a transition will be applied.
Flexible text editing tool
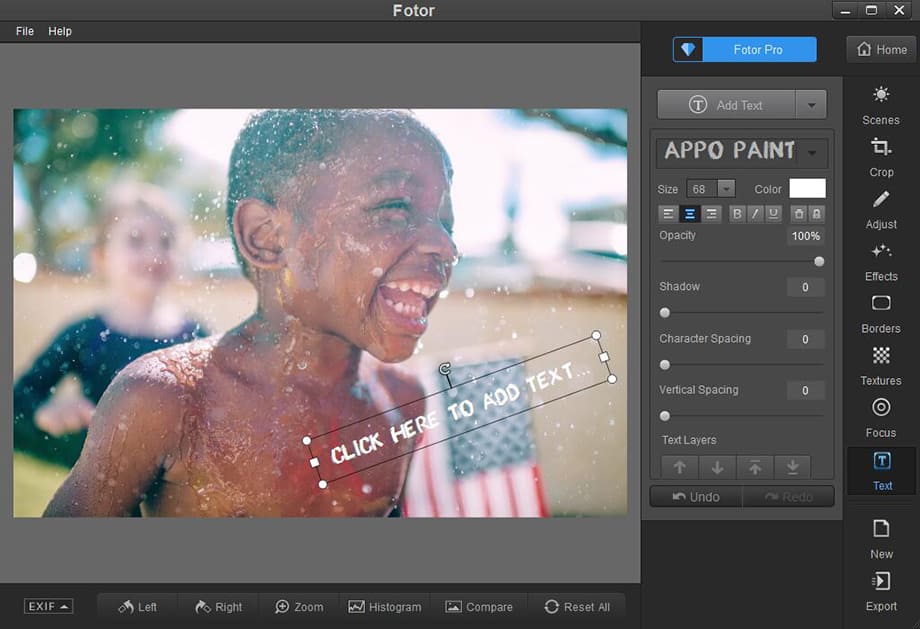
Got something to say? You can now add text to any photo. Lots of options to adjust the font, size and color of your text, plus move your words around till it looks perfect!
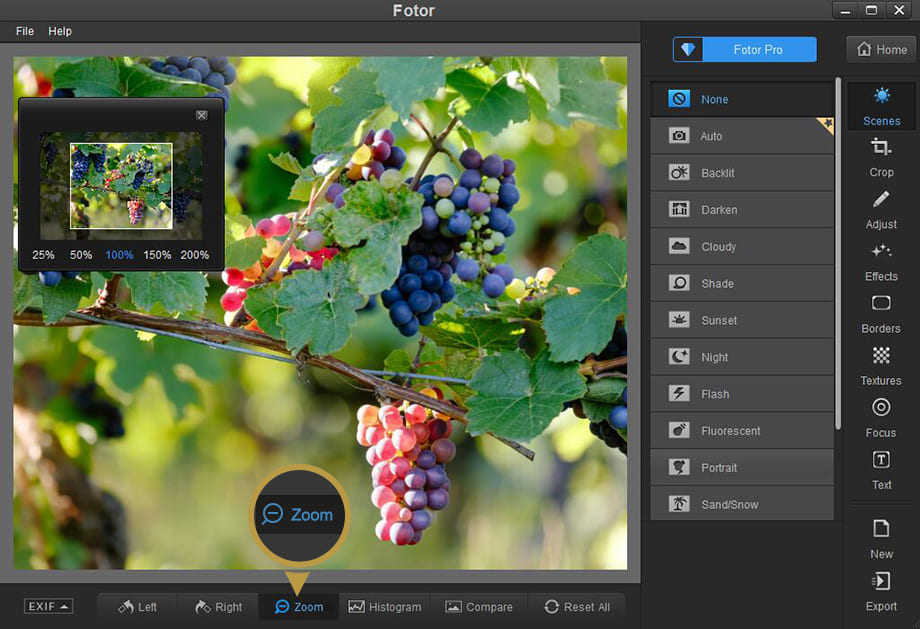
Zoom
To zoom in and view any part of your photo during editing, click on the magnifying glass at the bottom of the page. A small preview box will appear in the upper right-hand side of the viewer. At the bottom of this box you may select from five distinct levels of magnification. Choose 25%, 50%, 100%, 150% or 200% to zoom in or zoom out, and then click on your photo inside the small window and drag it in any direction to pan across the surface of your image. Click the "X" in the upper right-hand side of the preview box in order to zoom back out.
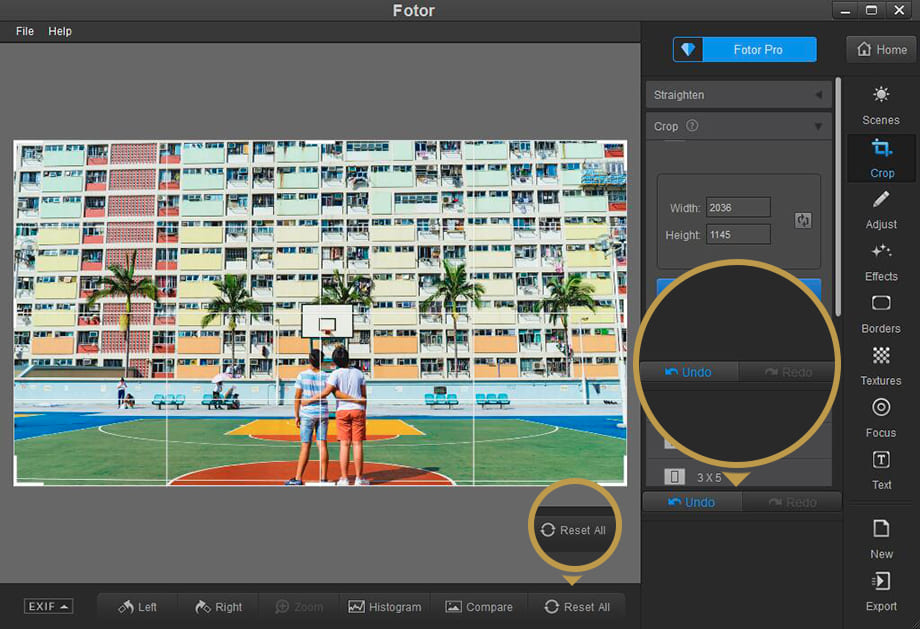
Undo/Redo or Reset All
Moving back and forward through different stages of your editing is as simple as clicking on "Undo" and "Redo" underneath the viewer. You can also select the option to "Reset all" if you would like to clear all changes, but keep in mind that this clears the software's memory of any recent edits.
Compare results with the original, unedited photo
Click and hold the "Compare" button at the bottom of your workstation to view the original photo at any stage during your editing session.
Start your collage
Click on "Add" in the upper left-hand corner of your workstation to upload photos to the sidebar(or called photo basket). You may add up to 30 photos at one time. To remove individual photos, simply click on the "X" in the upper left-hand side of the individual photo. To remove all photos (both from your photo basket and from the template canvas) click on "Clear All" on the bottom left-hand side of your screen.
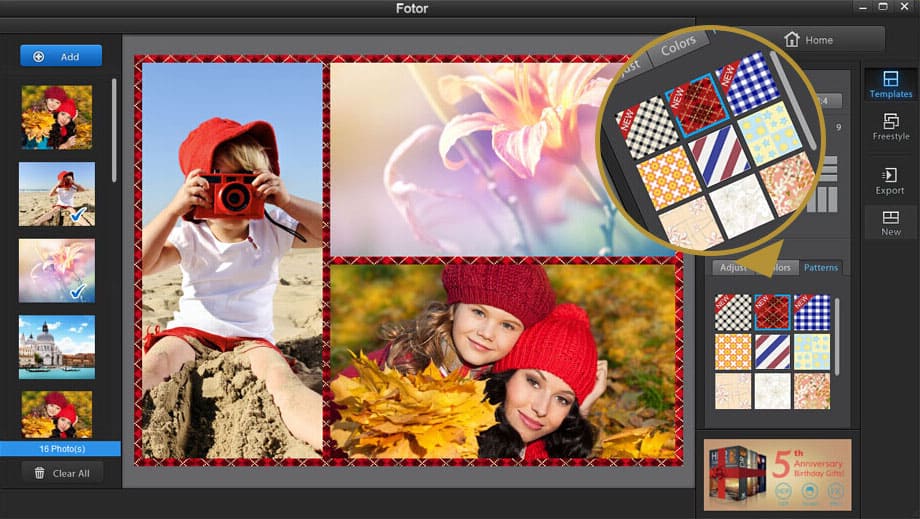
To begin your collage, drag photos from the photo basket on the left into the center of your template canvas, or double-click the photo with which you would like to collage. Notice that you can select from two modes of collage in the menu on the right: Template or Freestyle. In the Templates mode, you can select from 80 unique templates that have been designed for two to nine photos. In the Freestyle mode, you can move your photos around freely against the background color of your choice, or select one of our 22 unique background designs. While making your collage, you feel free to add photos from the photo basket, remove photos, and switch between the Templates and Freestyle mode.
![]() Make a Collage in Templates Mode
Make a Collage in Templates Mode
Click on "Templates" in the upper right-hand side of your screen to select from more than 80 templates layouts. Once in the Templates mode, you can select a ratio in the upper right-hand corner of your workstation to change the proportions of your collage. Pick a template for your collage based on the number of pictures you would like to use (up to 9 photos), or browse all of our templates for the layout you want to use. To add pictures to your collage, simply drag (or double-click) photos from the toolbar on the left into the available spaces in the template you have selected. Make adjustments to the corners, shadows, or width of your border by using the "Border" options on the bottom right-hand side of your workstation. From here you can also customize the color of your border, or select from 9 designer border patterns for the finishing touch.
![]() Make a Collage in Freestyle Mode
Make a Collage in Freestyle Mode
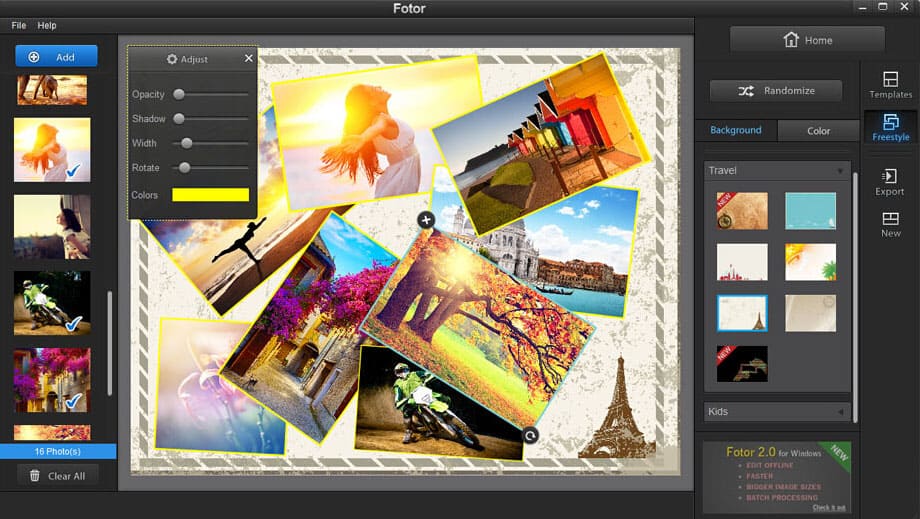
Select "Freestyle" in the toolbar on the right-hand side of your screen. When in the Freestyle mode of collage, you can choose a solid color as your collage background or select from 22 unique background designs. To start your collage, drag(or double click) pictures from the toolbar on the left side into the center of your workstation. As individual photos are dropped into your canvas space, an "Adjust" box will appear with options to change the opacity or angle of your photo. From here, you can also adjust the shadows width and colors for the border of the selected photo. Change the angle of your photo by clicking on the circular icon in the bottom right-hand side of a photo and moving your mouse in a circular motion. By clicking and holding this same circular icon and moving your mouse in an up-and-down motion you can change the size of the photo. Click on the "X" in the upper left-hand side of individual photos to remove a single photo from your canvas. Once a photo has been removed from your canvas space, it will still be available in the toolbar on the left side of your workstation. Lastly, you can mix up the angle and order of photos against the background you have selected by clicking on the "Randomize" button on the upper right-hand side of your workstation or dragging the photos around until you get just the right look.
Touch Up
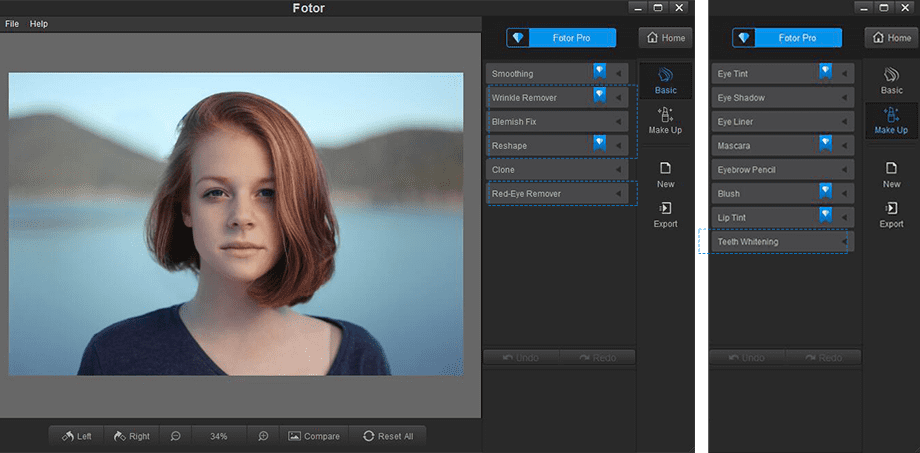
With a range of photo touchup tools to transform you portraits and photos, Fotor's Beauty Feature can bring out the radiant 'you' and give your photos makeup and a makeover - regardless of picture quality. With everything you need for portrait editing, you'll never take a bad shot again!
![]() Winkle Remover
Winkle Remover
Wrinkle smoothing has never been so easy with Fotor! With Fotor's free online wrinkle remover , you can easily smooth your skin and remove wrinkles with just a few clicks!

![]() Blemish Fix
Blemish Fix
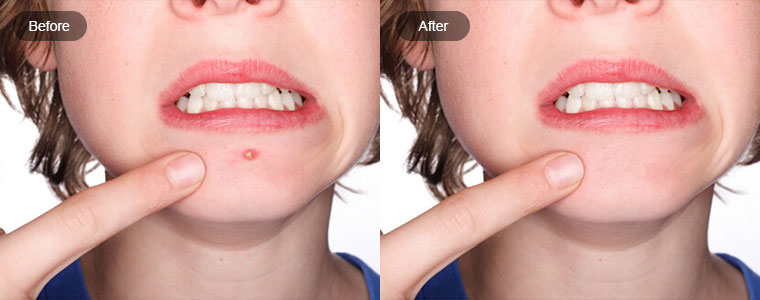
Sunburn, pimple breakout or even freckles can ruin an otherwise brilliant photo. With Fotor's Blemish Remover, any unsightly mark can be removed with ease!
![]() Reshape
Reshape
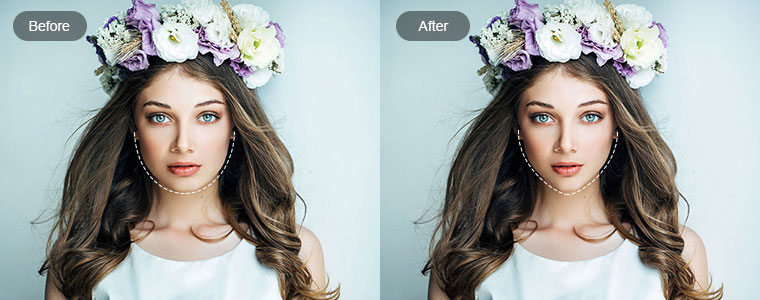
Losing, gaining or reshaping yourself used to be a strenuous task, but now it's super easy to reshape your body and face with Fotor's Reshape feature!
![]() Red-eye Remover
Red-eye Remover
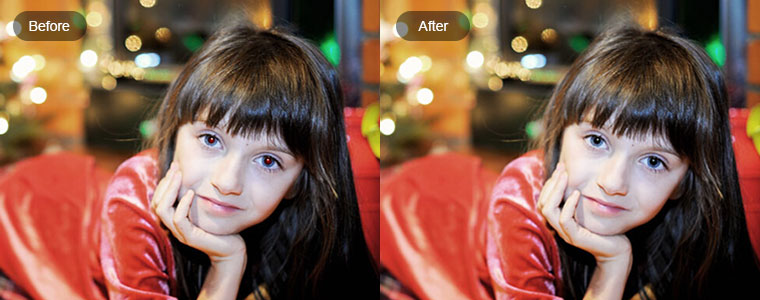
You had the perfect pose and everything to make your shot the best, but then you find yourself with GLOWING red eyes! Fotor's Red Eye Remover can help you out!
![]() Teeth Whitening
Teeth Whitening
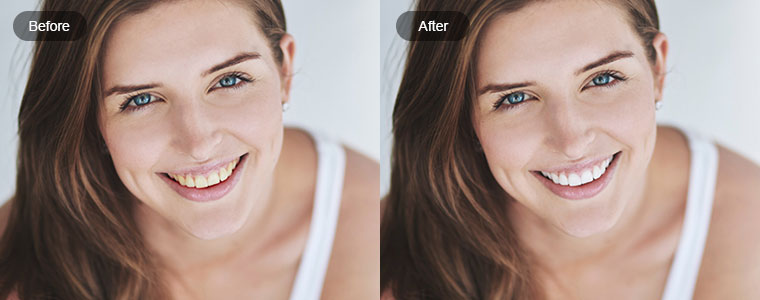
Coffee and tea stained teeth ruining your photos? You will always have a luminescent smile with Fotor's Teeth Whitening Feature!
Export,Resize,Share & Print
To export your edited photo, click on the "Export" button on the right-hand sidebar, and select whether you want to Save the photo to your computer or Share to one of the available social media networks.
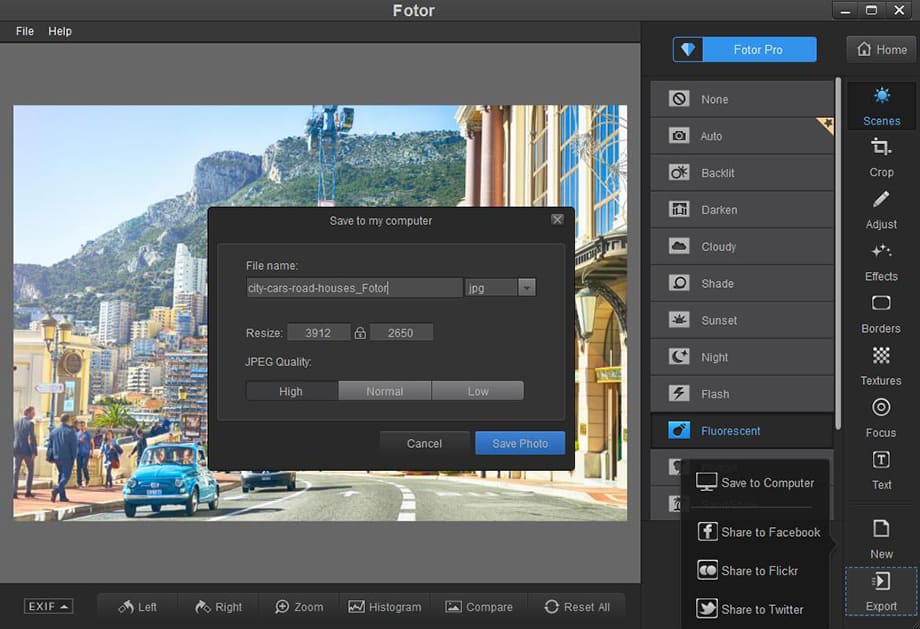
To Save to your computer, in the following dialog box you can choose a file name for your photo, as well as its dimension and quality (specifically for JPG format). You can select from .JPG, .PNG, .BMP, and .tiff as the type of file you want to save the photo as. Then click the "Browse" button to select where you want to save the photo.
If you want to change the size of the photo, you can enter the pixel width and height in the "Resize" field. When you type a number in one of the two fields, the other one will change automatically to maintain the proportions of the photo. Finally, if you are saving the photo as a .JPG, you can select the .JPG quality. Click High, Normal, or Low as desired.
To Share to a social network, follow the instructions provided by the network after you select it from the “Export” button.
To Print, simply select “Print” from the “File” menu in the menu bar at the top of your screen
Batch Processing
Process masses of photos at one time saving you time and effort Scenes, Effects, Borders and more
When you click Batch in the home menu, you are presented with the Batch Processing screen. The first step is to click “Select Folder” under Source to specify where the photos you want to process are located. Then do the same under Destination to specify where you would like the results to go. You can click Scenes, Effects, and Borders and decide which of these you would like to apply to your batch of photos.
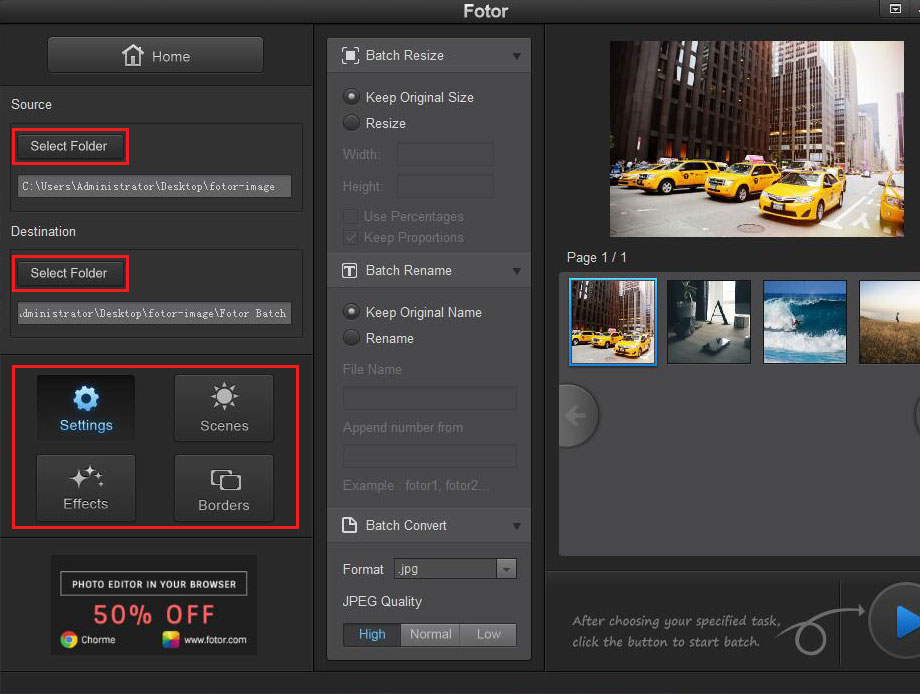
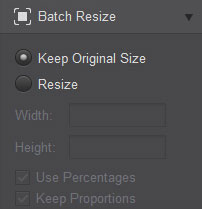
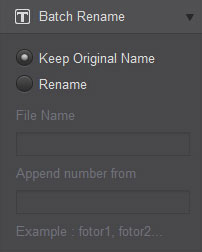
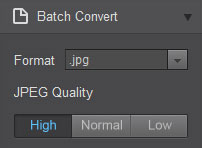
The “Settings” button is used if you want to change the size or file name of your photos, as well as specifying what file formats the output will be in.
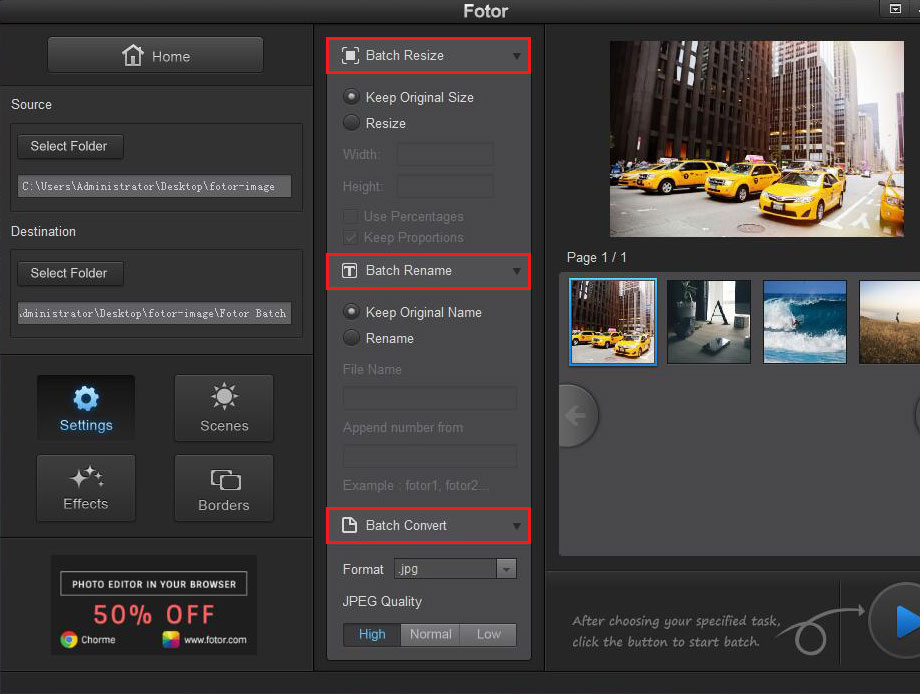
To resize a photo, click on “Batch Resize” and then “Resize”. You can then enter the new size that you would like the photos to be.
To rename the files, click “Batch Rename” and then “Rename”. Type the name you would like to use and what starting number you would like to append to the file names.
Lastly, under “Batch Convert” you can specify whether you want to save the files as .jpg, .png, .bmp, or .tiff.
When you are ready, simply click the blue button at the bottom right-hand corner to start the Batch Processing.
Whenever you are in the Edit, Collage, or Batch mode, simply click on the "Home" button on the upper right-hand side of your screen to return to the home menu and switch modes.
Help and Support
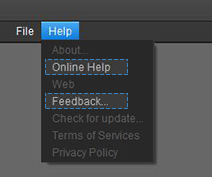
If you have questions about Fotor for Windows or if you have a suggestion for our team, we welcome you to send us your feedback by clicking here. We'd love to hear from you!
